Sunday, March 27, 2011

Chocolate Truffles - Brazilian style

I read about brigadeiros somewhere on Smitten Kitchen a little while ago and have been wanting to try them. Her recipe is more "advanced" than I felt up for tonight. Not really, but it involves coconut milk and a longer cooking time than I was willing to commit to. So I decided to stick with the basics: cocoa powder, condensed milk, and butter. That's it. At least until I decided to roll them in stuff after being inspired by their Wikipedia page. ;)

[Makes about 20 brigadeiros.]
Ingredients
3-4 Tbsp (unsweetened) cocoa powder
1 (14 oz) can sweetened condensed milk
1 Tbsp butter

Directions
Heat ingredients together in a saucepan over low heat, stirring constantly, until the mixture thickens. Chill in the fridge or freezer until the mixture is pretty firm -- malleable, but not too sticky.

Meanwhile, chop up some things to roll the candies in. I chopped up some hazelnuts, white chocolate chips, semisweet chocolate chips, and peanut butter chips. If I'd had some coconut flakes, I'd have tried that too!

Spread each topping in an even layer on a cutting board. When the mixture is sufficiently chilled, roll into balls with your hands (about 1-2 teaspoons' worth for each candy) and roll the balls in the desired toppings.

I think they taste delicious at room temperature, but keep them in the fridge until you're ready to eat them.

Storage idea
Wrap truffles individually in wax paper. I cut the wax paper into strips, rolled each strip over a truffle so that it formed a cylinder, and twisted the ends.


Variations:
1) Put a whole nut (e.g. hazelnut) into a truffle with the same topping.

2) If you like Lindor truffles, try dipping the brigadeiros in melted chocolate after doing the procedure described above and let the truffles cool. You'll end up with a hard(er) chocolate shell and soft truffle inside.

Quinoa Tabbouleh

This was my first experience making tabbouleh, and it came out great. I don't usually love tabbouleh, and I think using quinoa instead of the more traditional bulgur wheat is what makes this salad better than the usual, at least for my taste buds. This accompanied Asa's falafel, which was amazing.


[Serves 4-5 people.]

Ingredients
2 Tbsps oil
1-2 tsps ground cumin
1-2 tsps ground coriander
1 cup quinoa (I used red quinoa)
2 cups broth (or 2 cups water + 1 bouillon cube)

1 large carrot, grated
1-2 handfuls parsley, chopped
1 large cucumber, diced
2-3 tomatoes, diced
1 green onion, chopped fine
1/4 cup extra virgin olive oil
1/4 cup lemon juice

Directions
Heat oil in a cast iron skillet. When oil is very hot, toss in cumin and coriander and stir rapidly with a wooden spoon until the spices are dissolved into the oil. Toss on (thoroughly rinsed) quinoa and roast for 4-5 minutes.

Meanwhile, dissolve bouillon cube in the water (or set broth to boil) in a saucepan. Add in quinoa, cover, and simmer for about 15 minutes, until all the water is absorbed into the quinoa. Put the quinoa into the fridge to let it cool.

Meanwhile, combine all the other ingredients in a salad bowl. Throw in cooled quinoa. Toss together and serve.

Falafel - Second Attempt

I tried making falafel for Matt and Anna the other night. The first attempt didn't go so well; the first few patties went in whole but never came out. They didn't stay together and just degenerated into a chickpea crumble at the bottom of the pan. Fortunately Matt was around and suggested adding more flour to the mixture, which saved the day. I was able to cook two batches successfully before the oil turned to chickpea sludge and we had to stop due to health code violations.


I tried following Alton Brown's recipe:
1 pound dried chickpeas, sorted and rinsed
1 teaspoon whole cumin seed
1 teaspoon whole coriander seed
2 cloves garlic, coarsely chopped
4 small scallions, trimmed and finely chopped
2 teaspoons kosher salt
1/2 teaspoon freshly ground black pepper
1 teaspoon aluminum-free baking powder
1/2 teaspoon cayenne pepper
2 tablespoons chopped fresh parsley leaves
2 quarts peanut oil
Pita bread, warmed, for serving
I made a few adjustments: I used 3 cans of chickpeas instead of soaking my own pound. I used soybean oil instead of peanut oil and finally I added about a cup of fava bean flour to dry out the mixture. I just kept adding the flour until the mixture had the texture of cookie dough and then fried 'em up!


To actually make the mix you just put the oil in a pot with tall sides (to avoid spill over of hot oil; I learned that this is pretty important) and heat it to 350 degrees. In the meantime put all the other ingredients other than the flour in a food processor and pulse until there are no more whole chickpeas. Add in the flour, mix with your hands, and form into the shapes you want to fry! I made patties that were about an inch and a half in diameter. Then to cook just put gently in the oil and cook until golden brown. For me this took about 7-8 minutes.


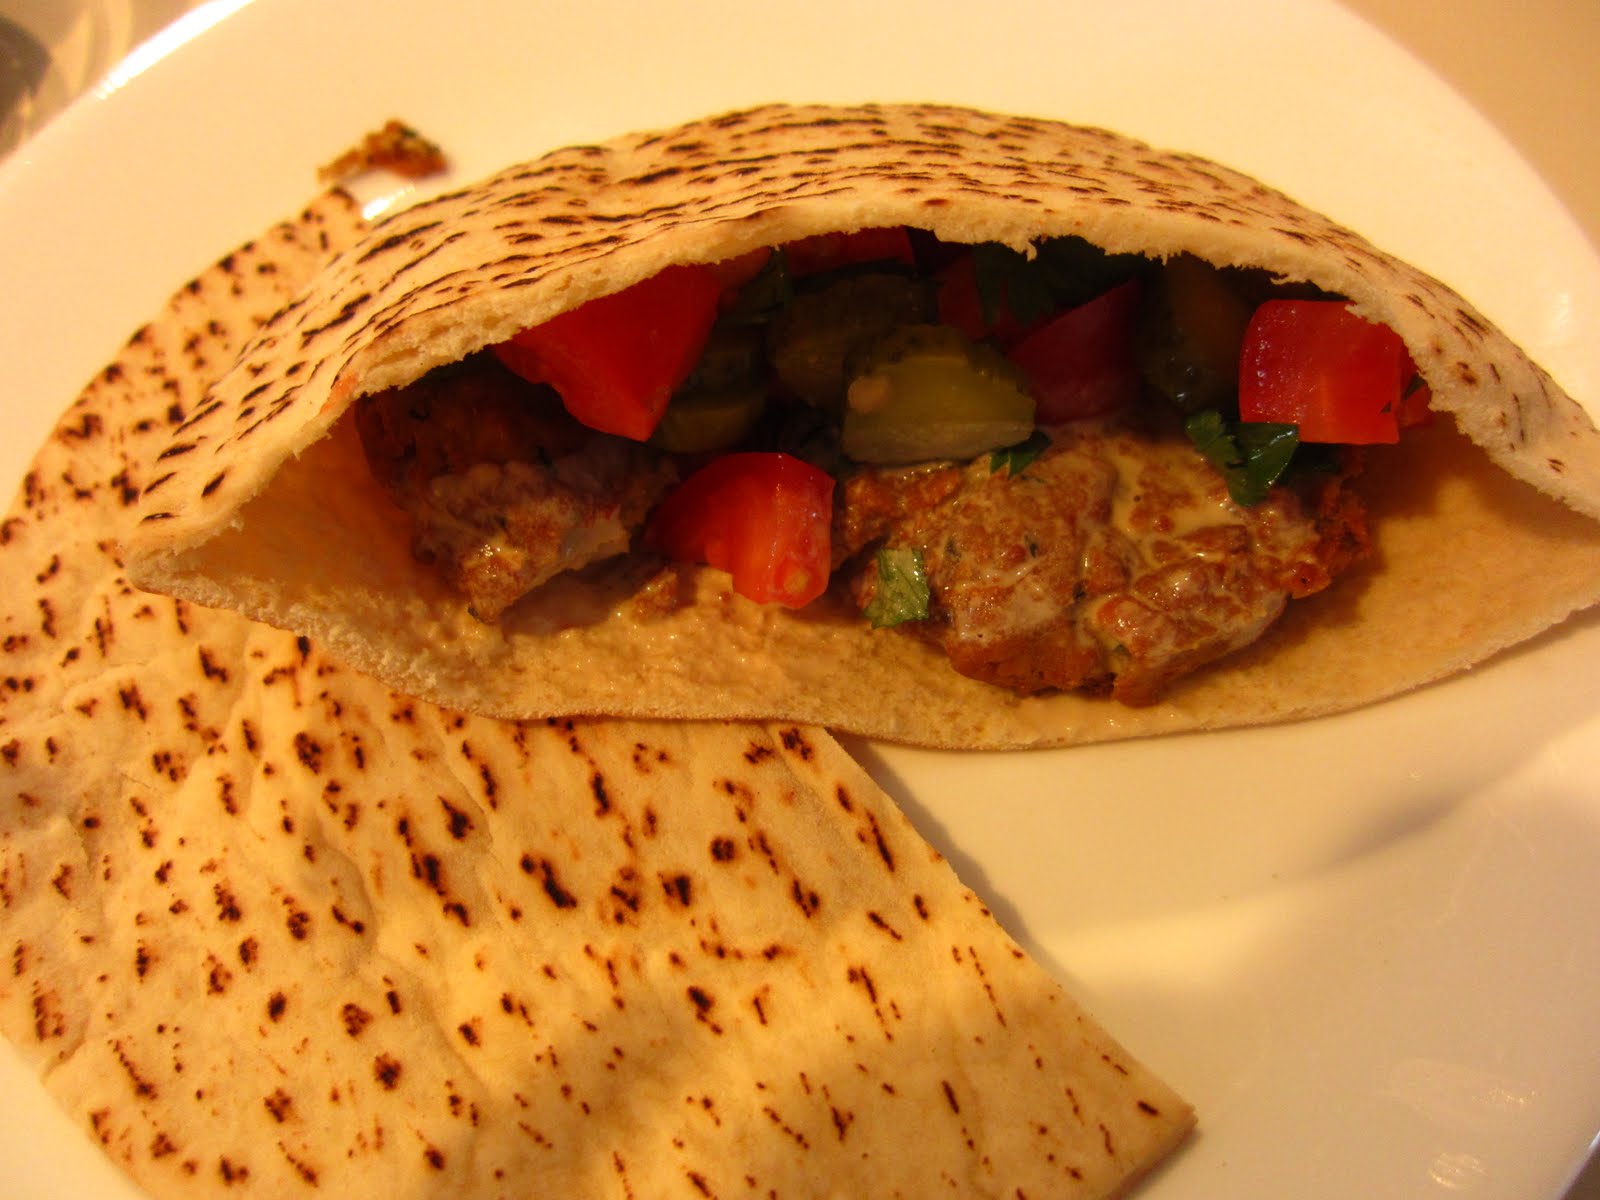
For sides and dressing I cut up some cucumbers and tomatoes, added some parsley, and put that in one bowl. In another I put chopped pickles, in another yogurt mixed with chopped parsley and finally one with tahini mixed with lemon juice.To make a falafel I took a pita, put in some cooked falafel and then add pickles (a must!), some tomato/cukes and either tahini sauce or yogurt sauce. They turned out pretty good and were really easy to make :)

Saturday, March 26, 2011

Shortbread

This has to be one of the quickest, easiest, and simplest home-made desserts possible. With a grand total of four ingredients and clocking in at just 30-35 minutes including prep and bake time, this recipe is a ridiculously easy way to get fat. But hey, if you're looking for comfort food, you just have to bite the bullet and jog the next day to make up for it. (Given that there are apparently 1628 calories in 1 cup of butter... that's a lot of jogging.)

So that's the bad news. The good news is that calorie-counting is a load of nonsense anyway, and these cookies are delicious. :) Here's the recipe that I use, adapted from Joy of Cooking.


Ingredients
1 cup (two sticks) butter
2 cups flour
1/2 cup powdered sugar
1/4 tsp salt

Directions
Preheat oven to 325F. In a medium bowl, soften butter in microwave -- it should be decisively warmer than room temperature, and starting to melt & liquefy a bit. Either using a whisk or a hand mixer, cream the butter (i.e. mix it up really fast until it looks like really thick cream). Sift together flour, sugar, and salt, pour onto creamed butter. Mix until everything blends together, at which point you'll have what appears to be a rather crumbly dough. Pat the dough into a square baking dish. If all went well, then once you pat it down it should have the texture of a slightly wet shortbread cookie. It'll look something like this.


Push down the edges of the shortbread with a fork. (This is purely for decorative reasons.) Now poke the dough evenly with the fork, so you have holes spaced an inch or so apart. Bake for about 30 minutes on the top rack, or until the crimped edges are starting to brown a little. The middle of the shortbread will still be pretty white, but that doesn't mean it's not ready. Remove from oven, let cool for about 10 minutes, and then cut it up into cookies of the desired shape and size.

Especially tasty with some black tea. :)

Thursday, March 24, 2011

Custard Fruit Tart w/ Graham Cracker Crust


I was trying to come up with a nice culinary surprise last night for Asa while he was at his soccer game, and realized that custard is a double whammy -- he loves it, and I've never tried making it before! So I looked up a bunch of different recipes, took the elements of each that seemed nicest, and hacked something together that actually turned out quite delicious, and extremely easy.

Graham cracker crust: I roughly used this recipe, but had to change around the proportions a bit and add a little extra flavor. I made enough to fill one round 8" cake pan and a small heart-shaped pie tin (see photo), so a little more than if you're just making one pie.
Ingredients
2.5 cups crushed graham crackers (I used "honey graham crackers" to good effect)
~3/8 cup sugar
10 Tbsp. melted butter
3/4 tsp. cinnamon
1/8 tsp. nutmeg (optional)
1/8 tsp. allspice (optional)

Directions (Graham cracker crust)
Preheat oven to 375F. Crumble up graham crackers in a bowl. I mostly did this by crushing them between my fingers, and then used the back of a large wooden spoon to mush them up more finely. It's OK if it isn't all a fine powder by the end, so long as there are no large pieces.

Add in sugar, butter, and spices. Blend together until the mixture has an even consistency throughout. Spread evenly in the cake pan (no need to grease it beforehand). I did this slowly, patting the mixture down firmly with my fingers, in order to get it to be spread evenly. Make sure you have enough to go up the sides of the cake pan, as well.

Bake on top rack of oven for 5-6 minutes. Remove and let it cook for a while. After it was no longer scalding hot, I relocated the tins to the fridge so that they'd be chillin' while I made the custard.
Custard: This turned out to be pretty easy! I forget which recipe I used most heavily of the ones I found online, but I make no claims to having completely invented this one:
Ingredients (Custard)
2 egg yolks
1/4 cup sugar
1/4 cup flour
1/2 tsp vanilla
1 cup milk

Directions (Custard)
To separate yolks from whites: crack egg over a cup, and pour yolks from one half of the shell to the other, letting the whites (clear goop at this point) pour down into the cup. When most of it is off the yolk, throw the yolk into a bowl. Repeat with the other egg.

Whisk together yolks, sugar, flour until the mixture has an even consistency. (1/4 cup sugar makes a pretty sweet custard. If you want it to be less sweet, vary sugar amount accordingly.) It's going to look kind of dry at this point, but that's alright.

Now heat up milk in a saucepan until it's too hot for you to comfortably hold your finger in it for more than a second or two. Slowly pour it in to the mixture while whisking together. At this point it's like thick milk with clumps in it.

Pour mixture into saucepan and add vanilla. Stir it slowly while heating over low heat. After 2-3 minutes, it should start getting pretty solid. When it's the consistency you like, take it off the heat.

Spoon the custard onto your pie crust(s), and smooth out the top with a spatula. Place a sheet of plastic wrap directly onto the surface of the custard, and pat it down a little bit so that it's firmly on there. (The point of this is to keep a gross film from forming.) Return the filled pie crust(s) to the fridge at this point to give the custard a chance to cool down.

To top it off nicely, chop up whatever fruits you want for a topping (kiwis and strawberries make for a beautiful tart -- sadly I had no strawberries this time). Heat up some light-colored jam (I used apricot) over low heat, stirring it to keep it from sticking to the bottom of the saucepan and burning, until it's pretty liquid. Remove the tarts from your fridge, take off the plastic wrap, and place your fruits on top of the tart (it looks nicest, I think, if they're all in one layer, but that's up to you). Brush the liquified jam over the tart evenly, and chill the tart. If you want to eat it right away, just stick it in the freezer for a couple of minutes and the jam will cool down right away.

EAT!
It was late, so we didn't attack the big one, which stayed in the fridge with plastic wrap on the custard. I like having a lot of custard in my fruit tarts, so the next day I added another layer of custard to the big fruit tart, this time with no vanilla to cut down on the vanilla taste.

Simple Fried Rice

The beauty of fried rice is that it doesn't have to answer to any standard or higher authority - nobody can tell you that it's done wrong. Technically you also need no recipe for it, but a starting point always helps.

This is a quick way of making this dish that works well for me, in part because it calls for "exactly what's in my fridge", which is often ... not much.

You can add anything you want to it and see how it comes out. It also tastes great by itself, courtesy of a few spices.


So, here's the scrounging plan:

Basics

  • Some Cooked Rice.
    Any rice would do if you're OK eating it. I use white Basmati (0.5 cup rice + 1.5 cups water, simmered covered until absorbed). I usually throw a little Ghee in it.
  • 1 Onion (large or a couple small)
    Diced, chopped, or cut into rose petals if that's what you like.
  • Shortening of choice (butter, ghee, etc).
    I use ghee when I can, and coconut oil is quite good too.

Optional but helpful:

  • 1 Potato (large or a couple small)
    Chopped really small. I use one of these to chop this and the onion in seconds.
  • 1 Egg
  • Random Vegetables (eg peas, edamame, corn, beans, scallions, etc) - whatever you have. The only concern with these is that they can add too much water, especially if they are frozen - drain or dry them a little, or just cook everything a little longer.
  • Meat, Tofu, etc can also be added
  • Spices:
    • Salt
    • Pepper (fresh ground ideally)
    • Turmeric
    • Cumin

Execution Plan

  1. Cook the rice - that will probably take 10-15 minutes so you'll have time to do everything else
  2. Heat some spices in the butter/ghee on a large pan. I grind pepper and throw in cumin and turmeric to taste. (More cumin than turmeric, ideally).
  3. Chop the potato and add to frying pan, fry on medium-high heat, turning nearly constantly. 3-5 minutes should be plenty - it'll start to look a little like hash-browns.
  4. Add salt and maybe more spices!
  5. Chop the onion and add to potato, fry a bit more.
  6. If using other veggies, you can add them now or later.
  7. Rice should be ready by now, toss it in and fry some more, turning constantly.
  8. When you feel that things are about done, crack an egg into the mixture and toss feverishly so it is evenly combined into the mix. The egg will cook in seconds, and you're done.


Wednesday, March 23, 2011

Honey Cornbread

I started making this cornbread 1-2 years ago, and I don't remember whose recipe I started with, or what it looked like at the beginning. But it's undergone quite a few changes, and doesn't look (or taste) much like the original at all. This produces a slightly sweet, airy, and moist cornbread. The more coarse the cornmeal, the tastier the cornbread, in my opinion, so I prefer the kind you can buy in bulk from grocery/health food stores. But any cornmeal will do. This tastes great grilled the next morning in a bit of bacon grease, too, and can easily be used to make corn muffins instead of a loaf (see footnote).

If you want to make this gluten-free, it's surprisingly easy. Just swap (cup for cup) the flour for your favorite gluten-free flour (I love this one for quick breads) and add about 3/4 teaspoon of xanthan gum. I've never been able to tell the difference. :)

Ingredients
1/2 cup butter
1/3 cup sugar
1/4 cup honey
2 eggs
1 cup buttermilk*
1/2 tsp baking soda
1/2 tsp salt
1 cup flour
1 cup cornmeal

* You can substitute a tablespoon of lemon juice in a cup of milk for the same effect.
Directions
Preheat oven to 375 degrees Fahrenheit and grease an 8"x8" glass baking dish. In a large skillet, melt butter. Remove from heat. Pour in sugar and honey and whisk until blended. Combine buttermilk and baking soda in a cup and set aside. Crack two eggs onto skillet and immediately pour on buttermilk mixture. Whisk together until blended. Pour on salt, flour, and cornmeal. Turn mixture with whisk until just blended. Do not overmix or the cornbread/corn muffins will be too dense. Pour batter into a greased baking dish and bake on top rack of preheated oven for 30** minutes, or until the top of the cornbread is golden brown and feels solid to the touch. Allow to cool for 10 minutes before eating.

** If you are making corn muffins, bake for about 20 minutes. These muffins won't rise as much as regular muffins do, so you can fill each cup in the muffin tin anywhere from 1/2 to 3/4 full, depending on how much of a muffin top you want to see. If any of the cups are unfilled when you've poured all the batter, fill those cups 1/2 way with water, which helps the muffins cook more evenly.

NB: Once you mix the buttermilk and baking soda, they start to react. Therefore, you want to do everything quickly after that step, as baking soda is not a double-acting agent. If you let them react for too long, the cornbread will come out more dense. Play with the timing in the recipe until the density is to your liking.

Sunday, March 20, 2011

Grilled Mahi Mahi with Couscous

Ingredients (for Mahi Mahi marinade)
1/4 cup lime/lemon juice
2 Tbsp olive oil
1 clove garlic
2-3 tsp spicy brown mustard
1/4 tsp salt
one twist of fresh ground black pepper
1 tsp of Worcestershire sauce

Whisk together and brush as much on Mahi Mahi fillets as possible. (This amount is probably good for up to 8 fillets.) Set aside. Meanwhile, make couscous (the following is good, or perhaps even a bit much, for 2 people):

Ingredients (for couscous)
2 cups water
1 boullion cube
1 cup couscous
1 handful of chopped parsley

Dissolve cube in water. Bring to a boil. Turn off heat and add in couscous. Cover and set aside for 7-8 minutes. Then, sprinkle on parsley and toss together. Keep covered until fillets are grilled.

Grill Mahi Mahi fillets for about 5 minutes on George Foreman grill or equivalent. Serve on bed of couscous.

Variations:
Use brown rice or quinoa instead of couscous for a gluten-free variant.

Flourless Chocolate Cake


Ingredients
8 oz chocolate
1/2 c. butter
1/4 c. hot brewed coffee
1/2 tsp. vanilla
3/4 c. sugar
3 eggs
1/2 c. cocoa

Preheat oven to 375. In a double boiler, melt chocolate, butter, coffee, and vanilla. Remove from heat. Whisk in sugar. Whisk in eggs until well blended. Fold in cocoa (until just mixed). Butter round 8" cake pan and pour in batter. Bake ~25 minutes (until very thin crust forms on top of cake). Let cool for a couple of minutes before eating. (Especially good with vanilla gelato!)

Variation: Sliced almonds on top.