Showing posts with label breakfast. Show all posts

Friday, January 16, 2015

Cheesy buttermilk biscuits


I love biscuits. I mean, to an unhealthy degree. Someone mentioned the word "biscuits" 3 days ago, and this ravenous part of my brain turned on and wouldn't shut up about how badly I need to bake and eat some biscuits right this second. And it wasn't even the relevant context: they were asking if they could give my dogs biscuits.  

I don't know how I waited 3 days before making them, but it happened, and it made the biscuits that much more delicious. No wait. It didn't. Because biscuits are the maximum amount of delicious already. 


Now that we're clear, here's a biscuit recipe. It is mostly adapted from the classic Joy of Cooking, with the addition of some cheese.

Ingredients
1 3/4 cups flour
3/4 teaspoon salt
2 teaspoons baking powder
1 teaspoon sugar
1/2 teaspoon baking soda
5 Tablespoons butter
3/4 cup buttermilk (or just put about a tablespoon of lemon juice into 3/4 cup milk)
1/4 cup grated parmesan
1/4 cup grated cheddar

Procedure
Preheat oven to 450F. Combine the flour, salt, baking powder, sugar, and baking soda in a large bowl. Cut in the butter (either with a pastry cutter or just with a knife). Keep chopping the butter up until it's as small as you're willing to get it. Pour in the buttermilk and the parmesan and mix lightly, just until you more or less have something you can call dough.

Turn the dough out onto a floured work surface. Knead gently for 20-30 seconds. Using your knuckles, pat the dough down to about 1/4 - 1/2 inch thickness. (Obviously the thicker the dough, the thicker the biscuit. I like mine pretty thick, but you may not. Play around with it if you're not sure.) Cut circles into the dough (I used the small end of a plastic funnel for canning; I've also used the rims from Ball jar lids). Place onto a foil-lined baking sheet. If you want a little cheesy crust on top, sprinkle the cheddar on top. Bake for 8-12 minutes, or until the biscuits are just starting to get golden on top.


Cut them in half, lengthwise, and add a thin pat of butter in the middle. Enjoy with some pork chops, tea and jam, or literally every other thing.


Monday, August 5, 2013

Bagel French Toast


Let me begin with two important facts. One, my freezer doesn't work. Two, this weekend my parents came for a visit from New Jersey which, among many other wonderful things, means that there are about a dozen bagels too many in my house. New Jersey bagels. In New England. I mean, it doesn't really matter how not hungry you are -- when that treasure finds its way to within eating distance, you eat. And let's face it, the freshest bagel ever made outside of the NJ/NY area doesn't hold a candle even to a two-week-old Jersey bagel from the freezer. But subtract the freezer from the equation, add two days, and all you have are tough, stale bagels that could have come from anywhere. And there's only one way to feel about that:


OK, so what do we do? French toastify! Soak the bagels in eggy milk for a few minutes and it's like they never gave you reason to wear that adorable long face.

Ingredients
[Makes about 3-4 servings depending on how hungry your servees are.]
2 old bagels, cut into rounds or wedges or slices
1/2 cup milk
2 medium eggs
cinnamon (optional)
cooking oil
chocolate chips (optional)
powdered sugar (optional)
maple syrup (optional)

Procedure
Whisk together eggs and milk (and cinnamon, if you're using it) in a wide-bottom bowl. Place bagels in a single layer in the mixture, and let them sit for a few minutes. Meanwhile, heat a pan over low/medium heat. Back to the bagels: flip them over and let them sit for a few minutes on this side as well. Shove chocolate chips, if using, into the now mushy bagel -- the deeper you shove them in the better, so they don't burn on the pan. Place the bagels chocolate chip side down (I tried it both ways and found that this way actually burned the chips much less). Cook on each side about two minutes, or until golden brown. If they're burning, lower the heat.


When ready to serve, sift some powdered sugar over everything and/or pour on maple syrup. Personally, I love the combination of sharp cheddar with sweet stuff and am not big on maple syrup, so my perfect bite includes some extra chocolate chips, a slice of cheese, and a sugared little bagel round.

Bagel crisis averted! (Well, more accurately, I've turned my bagel crisis into a french toast crisis, but it wouldn't be so bad if I weren't home alone and trying to consume way too much french toast for brunch.)


Sunday, October 14, 2012

Personal Peach Cobbler (and other fall stuff)

It's definitely fall. Where in central Vermont that once meant amazing foliage and crunchy fallen leaves to step on, it's now more about cloudy and rainy days with cold nights that justify the five days we spent hauling and stacking our three cords of firewood. (Whatever. I'll take it!) It also means pretty fall veggies, fruits, and... whatever this thing is.

(It's actually cauliflower. It's quite a hit with some stoners I know, though I haven't yet tasted it or heard any reviews from someone who has. It does have some cool mathematical properties, but I'm not sure how that impacts its taste.)

It's been a pretty good season of getting stuff from our CSA and picking our own whatever. A side note on that, by the way. We had "pick your own pumpkins" on the last day of our summer CSA. I was pretty excited about picking a nice fat pumpkin and hacking its stem off with a machete. So I was kind of confused when they didn't give us a machete when they pointed out the pumpkin patch. We went out there and all the pumpkins were already cut and just laying around on the ground.


Isn't that "pick-your-own" in the same sense that any produce aisle at a grocery store is pick-your-own? 

In any case, the point is that we have a bunch of pretty stuff that's all local and organic. (Except that melon with the sticker on it. That's from New Jersey.)


What I'm really trying to say is it's time to bake a bunch of fall stuff. Let's get this ADD party under control and get a recipe out there. There are really two: peach cobbler and pumpkin bread. To make it easier to find navigate later, I'll post pumpkin bread in a separate entry, though.


Ingredients 
(enough topping for about 3-4 one-person ramekins)

  • 1/2 cup flour
  • 1/2 cup rolled oats
  • 1/2 cup brown sugar, packed
  • 1/4 cup (1/2 stick) butter, melted
  • pinch baking soda
  • pinch baking powder
  • peaches, sliced
Procedure
Preheat oven to 350F. Fill little baking cups/ramekins almost to the top with sliced peaches. Add a tablespoon of water into each ramekin. [Note: I use peaches that I froze, so there is probably marginally more water content there than if you're using fresh ones, especially if the fresh ones you're using aren't that ripe. So you may want to edit that amount accordingly.] If you really have a sweet tooth, you can add a tablespoon or less for brown sugar here, but I just like the filling to be as is. 


Mix all the other ingredients in a bowl. It's easiest to just mush it up with your hands. There shouldn't be any really dry parts when you're done.


Crumble over the top of each ramekin. To get the peaches really bubbling, try to create a seal over the top of the fruit.  Bake in the oven for about 30 minutes. The topping should be a nice golden brown by then.

Wait a few minutes for it to cool slightly (and so you don't look like a total glutton because you grab food out of the oven and shove it down your throat -- again, maybe that's just me), and then EAT, man. With a cup of black tea. It'll survive waiting overnight and being reheated, but you're not doing anyone any favors by waiting more than a few minutes.

Variations
  • You can use a glass baking dish if you want to just make one normal-sized cobbler; bake for about 45-60 minutes in that case, and add a few tablespoons of water. 
  • Most other fruits are bound to work well -- combinations of them, too. I've successfully used apples, raspberries, blueberries, and strawberries. 
    • If you're using apples, increase the amount of water to about 1/4 cup if filling an 8x8 baking dish, and probably add some sugar -- I put in 1/3 cup for a full 8x8 dish. For the berries, no extra sugar is necessary in the filling, and very little water, if any.
    • If using strawberries, 3 teaspoons of brown sugar and 2 teaspoons of flour is all you need to add to the filling. No water.
    • If using blueberries, definitely don't add water. About 3 teaspoons each of white sugar and flour works pretty well.

Saturday, May 21, 2011

Moist Banana (or pumpkin!) Bread


I have been meaning to post this recipe for a long time. It has never served me wrong! One day maybe I will remember to take a picture before eating the banana bread, but it's unlikely. :) Though now (October 2014) I've actually managed to take a photo of the pumpkin variation before eating it, so here it is:


As a warning, start checking the bread after 45 minutes. Sometimes I need a full hour, but usually it's more like 50 minutes. On the other hand, be careful not to lose too much heat from the oven by checking too often, or it'll be dry by the time it's finally baked through. Once you've gotten to know your oven, just use your judgement!

Ingredients
3/4 to 1 cup brown sugar 
1/2 cup butter, melted
2 eggs
1 teaspoon vanilla extract
1/4 teaspoon baking powder
1/2 teaspoon baking soda
1 - 1.5 cups flour (depending on your preference)
3-4 very ripe bananas, mashed - if using frozen, defrost fully beforehand 

Preheat oven to 375F and grease a loaf pan. Blend together first four ingredients (mixing vigorously with a fork is fine). In a separate bowl, sift together the dry ingredients. Pour the dry ingredients into the wet ones and mix lightly (do not overmix). Fold in the bananas. Pour mixture into loaf pan and bake for 45-60 minutes.

Variations
  1. Try adding 1/2 cup of chopped nuts and/or dried fruits.
  2. Make it gluten free: replace the 1.5 cups of flour with 1.5 cups of gluten free flour (as always, I recommend Gluten Free Mama's Almond Blend) and add about 1/2 teaspoon of xanthan gum. If you don't have xanthan gum, that's fine -- the bread will come out a little flatter and more dense, but no less delicious.
  3. Pumpkin bread! Replace the bananas with a can of (unsweetened, unflavored) pureed pumpkin.

Wednesday, April 20, 2011

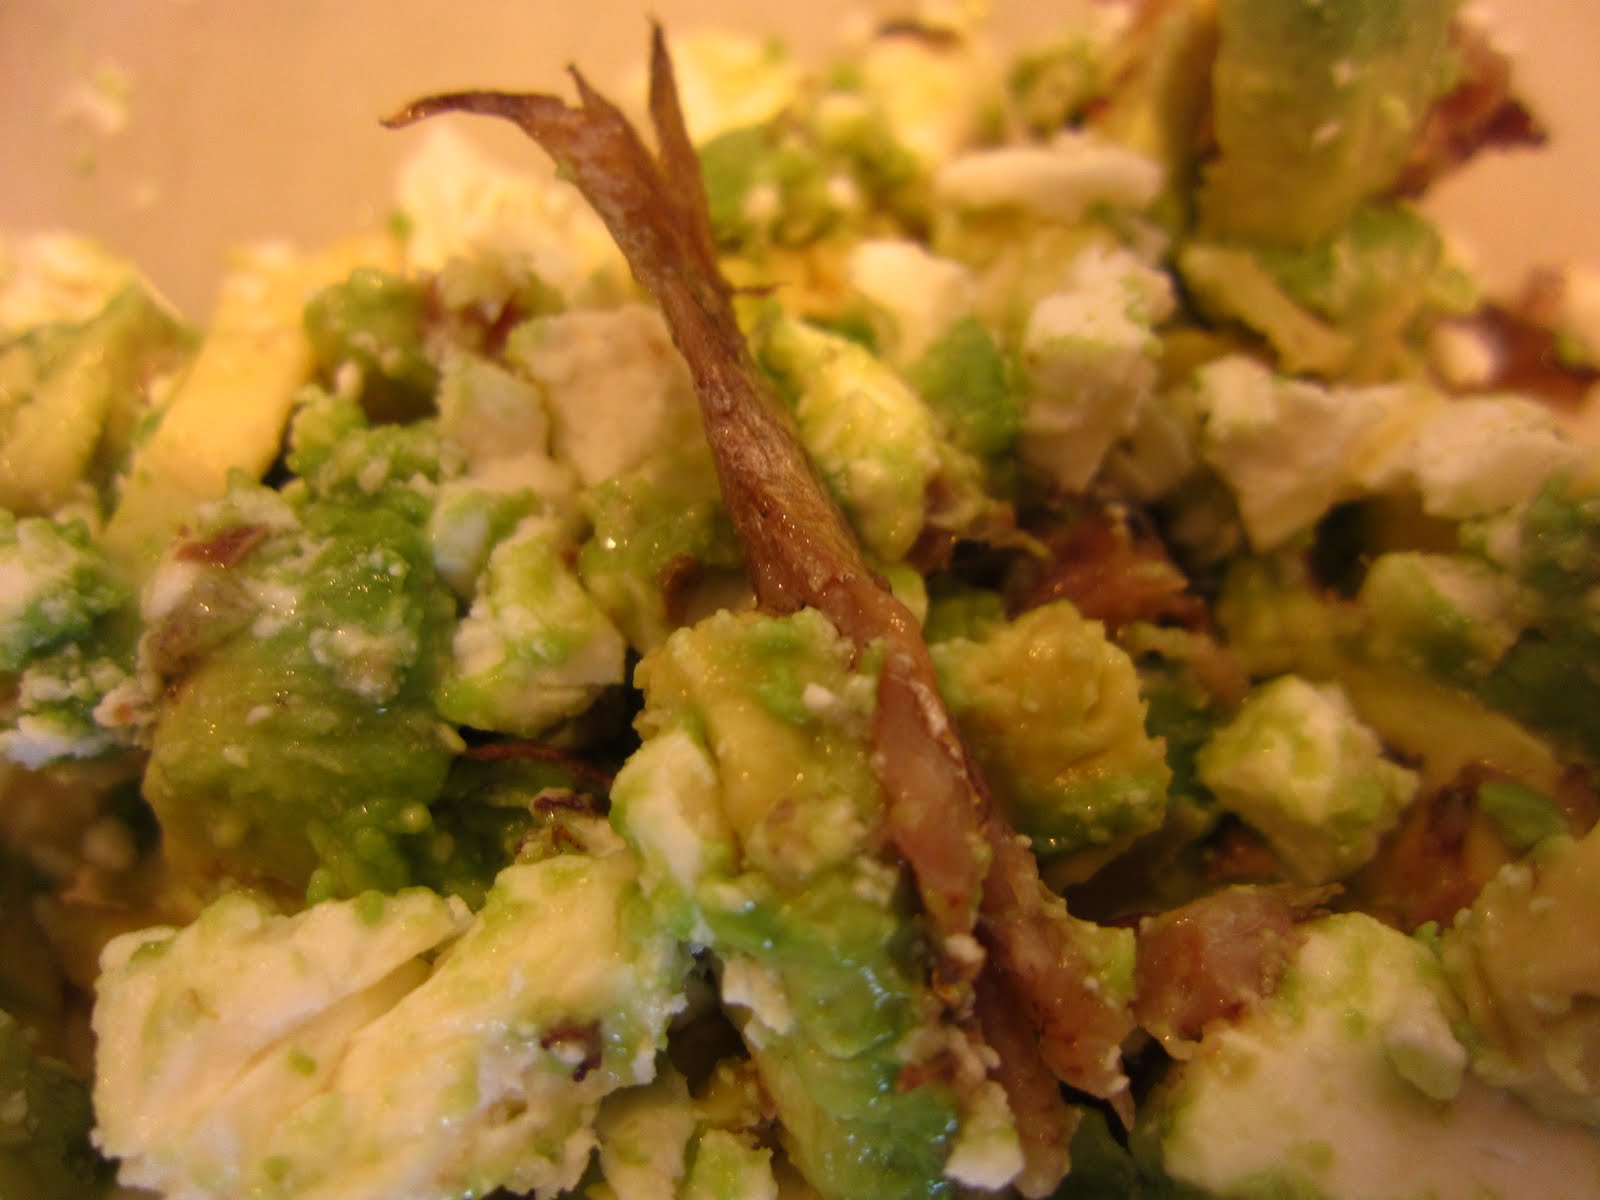
Avocado Pile

When I was a kid/teenager, my dad often made these "avocado sandwiches" for breakfast. They're more piles than sandwiches, but that's what I always called them growing up for some reason. He also added salmon caviar, which I don't have at my disposal anymore now that I live in a rural area with no Russian immigrants in it. He'd also frequently add in leftover salmon if he'd baked some the previous day, which is surprisingly delicious cold. The salmon adds a beautiful color to this recipe -- a talent that tinned sardines do not possess. Even so, if you can look past the drab appearance of the fish-in-a-tin that you found in the deserted end of the pantry, it makes for a shockingly delicious (and oh-so-nutritious!) meal.

I'm completely guessing on these amounts, by the way. It doesn't make any difference how much you add of what, so just throw in ingredients until things look and taste right to you.

[Makes two avocado piles.]

Ingredients

1 fresh, ripe avocado
3-4 sardines/anchovies/some other salty fish
1/4 cup feta cheese
2 eggs, poached or medium-boiled (slightly runny yolks)
freshly ground black pepper, to taste

Directions
Get your eggs cooking. If you're poaching the egg, just boil some water in a deep pan and crack the eggs carefully into it. Flip the egg over halfway through, and remove the egg just after the whites have been cooked. If you don't mind running egg whites, which I find gross, then you can remove them even earlier! If boiling, put the eggs in cold water and cook over medium heat. After the water has been boiling for just under 2 minutes (though the exact amount depends on how much water you used -- the more water, the faster the egg cooks), pour the water out and run the eggs under cold water; peel.

Meanwhile, cut avocado in half and remove the pit. (The best way to do that is to give it one firm chop with a sharp knife and then gently rotate the pit. It should come out easily as you pull the knife away.) Carefully slice up the scrumptious green meat into cubes


Using a fork, scoop the avocado out into a bowl, but reserve the shells for serving. Crumble up the feta and add it to the bowl, along with the fish. Grind in pepper (and whatever other seasoning floats your boat) to taste. Chop up the (hopefully slightly runny) egg and toss it on. Serve inside the avocado shells.

Variation
: Try the original -- replace the canned fish with salmon, either smoked or leftover from whatever method of preparation you prefer (baked, fried, grilled...). In this variation, remember to squeeze some lemon juice in the mix.

Saturday, April 16, 2011

Gluten Free Banana Chocolate Chip Muffins


This recipe is adapted to gluten free from this one. Which means I didn't do anything very inventive besides lower the amount sweet stuff and put in the right amount of xanthan gum.

Ingredients
  • 1 3/4 cups your favorite gluten free flour
  • 7/8 tsp. xanthan gum
  • 1/2 cup sugar
  • 1 tsp. baking powder
  • 1 tsp. baking soda
  • 1/2 teaspoon salt

  • 1 egg
  • 1/2 cup vegetable oil
  • 1/2 cup plain yogurt --> important for acidity (some people report good results when using milk, but I still think yogurt is important in this recipe)
  • 3/4 teaspoon vanilla extract
  • 1+ cup mashed ripe bananas
  • 1/2 cup semisweet chocolate chips
Directions
Preheat oven to 350F. Combine first six ingredients in a bowl. In a separate large bowl, combine the egg, oil, yogurt, and vanilla. Pour dry ingredients into wet ingredients and fold over until just combined -- there can still be dry bits of flour in it, and that's fine.

Anyway, fold in the mashed bananas and chocolate chips. Grease muffin tins and fill each cup no more than 3/4 full (depending on how much of a muffin top you want to see in the finished product). Bake for 20-25 minutes. Cool for a little bit before removing from tins, and then transfer to a cooling rack.

Fun fact: In general, you don't want to overmix muffins or you'll have a tunneling problem: dense muffins with a bunch of holes in them from the air bubbles. (i.e. Use the muffin method, and Alton Brown fans, you know what that means.) But tunneling is created by gluten, a protein composite you don't want to over-excite if you don't want your muffins tasting like bubble gum. Our flour had no gluten to begin with, though, so maybe the muffin method is not as important in gluten-free baking. Does anyone actually know if this is true?

Wednesday, April 13, 2011

Nutty Energy Bars

This recipe came from River Cottage Every Day, unsurprisingly. I made a few adjustments on the basis of lacking ingredients or not liking certain things (e.g. using almond butter instead of peanut butter). In the end, I thought it was a little too sweet, so next time I would use maybe 1/3 cup of brown sugar and 2-3 tablespoons of honey. A suggested variation in the book is to use a mashed ripe banana in place of the nut butter, but I haven't tried that yet.

As you can see, my attempt at these bars gave me an odd pattern -- I tossed the seeds over the top and the mixture started bubbling when it came to a boil in the oven, and evidently it came up over the sides. I think it's pretty neat -- plus the edge pieces have no seeds, for added variety.
:)

Ingredients

1/2 cup butter
1/3 cup raw, unsalted, unsweetened nut butter (I used almond butter)
1/4 cup honey
2/3 cup (packed) brown sugar
little bit of lemon zest (grated)

1 1/4 cups rolled oats
1 cup mixed seeds
1/2 cup raisins
1/2 cup (or less) chocolate chips

Directions
Preheat oven to 325F. Melt first five ingredients in a saucepan over very low heat, stirring occasionally. Add in the oats, raisins, and about 3/4 of the seeds. Mix together.

Grease an 8" baking dish and line with parchment paper (so that it's easy to remove the concoction after baking). Pour in "batter," smoothing it out on top. Scatter chocolate chips and remaining seeds on top.

Variation: I added half of the chocolate chips directly into the saucepan to have a more chocolatey base.

Bake for about 30 minutes. For me, the stuff came out pretty much liquid, which figures as there aren't a lot of solid (when heated) ingredients. Put it in the fridge until it cools completely -- it'll be pretty much rock hard by then. :) Store in the fridge, and eat at a little lower than room temperature so everything doesn't goo up in your hands.

Monday, April 11, 2011

Energizing Breakfast Juice

We have a new cookbook -- River Cottage Every Day. It's all about "rustic" recipes using local and in-season produce. OK, so maybe using bananas violates the local bit, but just try living in Vermont and getting local, in-season produce when there's still snow on the ground! Anyway, the recipe for this juice comes from that book, though I didn't have everything it called for and I increased the amount of parsley (his recipe also calls for using 1" fresh peeled ginger root and maybe something else I've forgotten).

I'm not sure the parsley did anything when put through the juicer -- so next time I tried blending it with the banana instead of juicing it. This definitely gave it a stronger parsley taste. I like it either way.


Ingredients

1 apple
1 pear
1 carrot
2 celery stalks
4 sprigs parsley
1 banana

Directions
Put everything but the banana in a juicer. Then blend the banana in separately. For a drink that's more of a smoothie, and extra nutrients, juice the carrot and celery stalks and then put everything in a blender.

Wednesday, March 23, 2011

Honey Cornbread

I started making this cornbread 1-2 years ago, and I don't remember whose recipe I started with, or what it looked like at the beginning. But it's undergone quite a few changes, and doesn't look (or taste) much like the original at all. This produces a slightly sweet, airy, and moist cornbread. The more coarse the cornmeal, the tastier the cornbread, in my opinion, so I prefer the kind you can buy in bulk from grocery/health food stores. But any cornmeal will do. This tastes great grilled the next morning in a bit of bacon grease, too, and can easily be used to make corn muffins instead of a loaf (see footnote).

If you want to make this gluten-free, it's surprisingly easy. Just swap (cup for cup) the flour for your favorite gluten-free flour (I love this one for quick breads) and add about 3/4 teaspoon of xanthan gum. I've never been able to tell the difference. :)

Ingredients
1/2 cup butter
1/3 cup sugar
1/4 cup honey
2 eggs
1 cup buttermilk*
1/2 tsp baking soda
1/2 tsp salt
1 cup flour
1 cup cornmeal

* You can substitute a tablespoon of lemon juice in a cup of milk for the same effect.
Directions
Preheat oven to 375 degrees Fahrenheit and grease an 8"x8" glass baking dish. In a large skillet, melt butter. Remove from heat. Pour in sugar and honey and whisk until blended. Combine buttermilk and baking soda in a cup and set aside. Crack two eggs onto skillet and immediately pour on buttermilk mixture. Whisk together until blended. Pour on salt, flour, and cornmeal. Turn mixture with whisk until just blended. Do not overmix or the cornbread/corn muffins will be too dense. Pour batter into a greased baking dish and bake on top rack of preheated oven for 30** minutes, or until the top of the cornbread is golden brown and feels solid to the touch. Allow to cool for 10 minutes before eating.

** If you are making corn muffins, bake for about 20 minutes. These muffins won't rise as much as regular muffins do, so you can fill each cup in the muffin tin anywhere from 1/2 to 3/4 full, depending on how much of a muffin top you want to see. If any of the cups are unfilled when you've poured all the batter, fill those cups 1/2 way with water, which helps the muffins cook more evenly.

NB: Once you mix the buttermilk and baking soda, they start to react. Therefore, you want to do everything quickly after that step, as baking soda is not a double-acting agent. If you let them react for too long, the cornbread will come out more dense. Play with the timing in the recipe until the density is to your liking.