Showing posts with label vegetarian. Show all posts

Friday, January 16, 2015

Cheesy buttermilk biscuits


I love biscuits. I mean, to an unhealthy degree. Someone mentioned the word "biscuits" 3 days ago, and this ravenous part of my brain turned on and wouldn't shut up about how badly I need to bake and eat some biscuits right this second. And it wasn't even the relevant context: they were asking if they could give my dogs biscuits.  

I don't know how I waited 3 days before making them, but it happened, and it made the biscuits that much more delicious. No wait. It didn't. Because biscuits are the maximum amount of delicious already. 


Now that we're clear, here's a biscuit recipe. It is mostly adapted from the classic Joy of Cooking, with the addition of some cheese.

Ingredients
1 3/4 cups flour
3/4 teaspoon salt
2 teaspoons baking powder
1 teaspoon sugar
1/2 teaspoon baking soda
5 Tablespoons butter
3/4 cup buttermilk (or just put about a tablespoon of lemon juice into 3/4 cup milk)
1/4 cup grated parmesan
1/4 cup grated cheddar

Procedure
Preheat oven to 450F. Combine the flour, salt, baking powder, sugar, and baking soda in a large bowl. Cut in the butter (either with a pastry cutter or just with a knife). Keep chopping the butter up until it's as small as you're willing to get it. Pour in the buttermilk and the parmesan and mix lightly, just until you more or less have something you can call dough.

Turn the dough out onto a floured work surface. Knead gently for 20-30 seconds. Using your knuckles, pat the dough down to about 1/4 - 1/2 inch thickness. (Obviously the thicker the dough, the thicker the biscuit. I like mine pretty thick, but you may not. Play around with it if you're not sure.) Cut circles into the dough (I used the small end of a plastic funnel for canning; I've also used the rims from Ball jar lids). Place onto a foil-lined baking sheet. If you want a little cheesy crust on top, sprinkle the cheddar on top. Bake for 8-12 minutes, or until the biscuits are just starting to get golden on top.


Cut them in half, lengthwise, and add a thin pat of butter in the middle. Enjoy with some pork chops, tea and jam, or literally every other thing.


Saturday, March 22, 2014

Easy fridge pickles


This recipe works for just about any vegetable that you have going to waste in the back of the refrigerator. We did it with baby red peppers and string beans, and they turned out really delicious. We'll definitely be doing this with other veggies in the future, too!

Ingredients
[Makes enough to fill 3 quart-sized Ball jars]
~ 3 lbs. string beans, peppers, and/or whatever other veggies you want to pickle
3 cups vinegar
3 cups water
4.5 Tbsp. pickling salt
6 cloves garlic
6 Tbsp. dill seed


Procedure
Clean the jars in boiling water to disinfect. Put the garlic and fennel seeds into the bottoms of the jars.

To make the brine, combine the vinegar, water, and salt in a large pot until the mix comes to a roiling boil. While that's heating, put the veggies into the jars on top of the spices. Try to pack them in pretty tight. You may need to trim the beans if you're using pint jars or the veggies are particularly long, but I didn't find this to be an issue in the quart jars.

Pour the brine over the veggies, leaving about a 1/2 inch at the top. Stir a little bit to remove any air bubbles, put on the lids, and stick the pickles in the fridge for about a week (for full flavor). That's it!


Storage
These will last for a while (at least several weeks) in the fridge.

If you've canned stuff (like jam, or "real" pickles, or tomatoes) in your life, you probably know that there are more particular steps to be followed. One thing that's so great about this recipe is how easy it is, because the pickles last for a long enough time in the refrigerator to render serious canning unnecessary. But if you do decide to can them, this recipe will still be perfectly fine---you're just on your own for the canning procedure. This is what happened when we tried to do it:


And no. This is not our first attempt at canning. Maybe some people just aren't meant to be able to make pickles that can be stored indefinitely at room temperature. 

Variations
You can add red chili flakes for a bit of a kick, but as our household average spice-wussiness level is quite high, we haven't tried. 

Wednesday, May 8, 2013

Fiddleheads!


too old!
So I was wandering around in the yard the other day looking for a big stick... as I do. And then out of the corner of my eye, I saw some ferns. Which reminded me, as I get reminded every year, that I have been planning on foraging for fiddleheads for the last five years. But every year, when I am reminded, I'm invariably reminded by the tall, unfurled, mostly full grown ferns that we see all summer, and not by the small, edible (nay, delicious!) young shoots.

That's the problem with fiddleheads. They aren't edible for longer than a few days, or at least that's how it seems to me. They start coming out in spring or even early summer, according to sources on the internet, but at least this year (maybe due to unseasonable heat? it's been near 80 for the last couple of weeks), most of the ones I've seen have already been mostly unfurled.

So I was really excited to see these little edible shoots. SO EXCITED.  

juuuuust right.
To make sure you're picking the right variety of fern, look at the stalk. If it curls inward like a celery stalk, you've got the right one. You can just rip them off -- the bottom bit of the stalk is a bit white, and people claim this part is woodier and not really tasty (I wouldn't know though) so I just ripped above that. When they're young, they'll snap pretty easily.

Before you go nuts, Wikipedia gives some sense that fiddleheads are full of healthy stuff but may also be harmful if ingested in great quantities:
Fiddleheads contain various vitamins and minerals, as well as omega-3 and omega-6 fatty acids. They are a source of antioxidants and dietary fibre.[2] They are low in sodium, but rich in potassium, which may make them suitable for people who need a low-sodium diet.[4]
Fiddleheads may harbour microbes, and should be washed and cooked before eating.[2]
Many ferns also contain the enzyme thiaminase, which breaks down thiamine. This can lead to beriberi and other vitamin B complex deficiencies if consumed to excess or if one's diet is lacking in these vitamins.[5]
Further, there is some evidence that certain varieties of fiddleheads, e.g. bracken (Pteridium genus), are carcinogenic. Ostrich fern (Matteuccia struthiopteris) is not thought to cause cancer,[6]although there is evidence it contains an as yet unidentified toxin.[7]
Though it seems like these types of fiddleheads (ostrich ferns) haven't been known to cause specific health issues, may as well play it safe and only eat a bit at a time.

So now that I've said that, let's move on to the cooking bit. Clean off any of the dried brown leafy bits that may be stuck to the fiddleheads and wash them thoroughly.


Step 1. Steam or boil for 10 minutes.
It seems to be generally accepted that whatever toxins may be in ostrich ferns, you can nullify their effect by steaming the ferns for 10 minutes first.

Step 2. Saute in butter and lemon.
Drizzle a bit of lemon on them and saute in a bit of butter for 2-3 minutes. Drizzle just a little more lemon on top and serve.

Serving suggestion.
Serve on a bed of quinoa with a side of pickled daikon (or whatever happens to be in the fridge when you're serving hungry people a late dinner). Fried egg on top is also delicious.


Monday, November 19, 2012

Butternut Squash & Almond Soup

This is now the second (edible) soup I've made with almonds. The other one (African nut butter stew) is pretty filling, as vegetarian soups go. This one is much lighter, and is good for a small snack or as a precursor to a glorious almost-in-a-food-coma-while-still-eating dinner (i.e. Thanksgiving). This comes from a friend, LG.

Pictured with Cedar Circle Farm's Trukenbrod whole spelt bread, which is amazing and delicious and you should try it if you live around VT/NH.

Ingredients
1 butternut squash
4-6 cups broth
1 cup almonds
curry powder, to taste
black pepper, to taste

Procedure
Boil about 3 cups of broth. Peel the squash (this is really not too bad if you just use a sharp vegetable peeler -- takes a minute and you don't lose much of the flesh). Cut it into cubes, and put it in the boiling broth. Add as much broth as you need to completely cover the squash. For one medium squash, I used about 5 cups of broth (not including the 1/2 cup that comes later; see below) and got a thin soup, which was delicious and not as heavy as squash soup usually feels. Lower the heat and simmer, covered, until the squash is completely cooked through -- about 10-15 minutes.

Meanwhile, blanch the almonds (i.e. pour boiling water over them and let sit for a minute). Rinse with cold water until they're cool, and peel the skins off. They should pop off pretty easily at this point. Put the peeled almonds with about 1/2 cup of broth into a food processor, and process until the nuts are as finely processed as you'd like to have in your soup.

When the squash is cooked, remove it from the broth (don't toss the broth!) and process it with the almonds. When it's all pureed (or to whatever chunkiness level you prefer), add the almond and squash puree back into the broth and mix everything together thoroughly. You may want to use a hand mixer or immersion blender if you have one, but a whisk would do the trick as well.

Serve hot. Keeps for a while in the fridge, though the puree may start to separate a little when it sits.


Sunday, October 7, 2012

Chicken of the Woods!

OK, so it's been a while. Let's (re)start off with a bang. Or at least with an extremely orange mushroom that tastes like chicken. What! Yeah. We finally found the supposedly plentiful "chicken of the woods" mushroom (a.k.a. Laetiporus sulphureus blah blah whatever look it up). It looks like this:


Some cool things about this mushroom: 
  • dude, would you just look at it?

  • if you find some, you probably find about 20 pounds of it
  • it is impossible to mistake for something inedible
  • it is delicious, keeps for a few days before cooking if necessary (and for a while in the freezer once cooked)
  • it tastes like chicken!
  • you can serve it with shrimp and make some "chicken of the woods/chicken of the sea" joke, probably

Let's get to it, then. First, the prep: it's pretty easy. If the inner part (the part closer to the stalk) is kind of corky/woody, you may want to cut it out and just get rid of it. Don't wash it, since it'll get super soggy (or so they say on the internet). Scrubbing off the dirt is good enough, though. Now, the recipe.

Ingredients
  • 3-4 Tbsp butter
  • 2 cloves garlic, minced
  • 5 cups CHICKEN OF THE WOODS, WOOOO!, chopped into bite-sized pieces
  • salt, to taste
  • 2-4 Tbsp sour cream
  • 1-3 Tbsp chicken stock
Procedure
In a large (non-stick? I dunno, worked well for me) pan, heat up the butter. Throw in the garlic and mushrooms and saute until the mushrooms get a bit reddish/brown -- about 10-15 minutes. When it's ready it'll have the consistency of a tender but not particularly juicy chicken breast; add salt to taste.

The sauteeing may take longer or shorter depending on how old/thick the specimen is, how water-logged it is, whether you actually got L. sulphureus or L. cincinnatus (closely related but a little different), etc. Just use your judgment. I've also heard that if you cook it for 15 minutes and the consistency is far from where you want it to be, just give up. Specimens vary greatly and you've probably got a crappy one. 


At this point, I found the mushrooms to be a little dry, so I mixed in a couple of tablespoons of sour cream with a little bit of chicken stock. You can skip this step if you like the juiciness level as is. 


Can be served as is or if you're looking for a bit more flavor, add in some shrimps (I cooked them the same way as the mushrooms and mixed them all in together).
Definitely going back tomorrow to pick the rest of the mushrooms we found. Will report back eventually on whether our guests get poisoned.

Edit: It's been a day and everyone's still alive. Success! We went back and picked everything off that log:


Friday, May 27, 2011

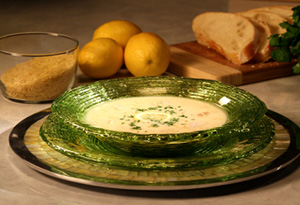
Avgolemono (Greek egg-lemon soup)

This soup is amazing. It's vegetarian, gluten-free, easy to make, and really refreshing on a hot day. You can vary the thickness with the milk and butter content -- I halved the milk and butter from the original recipe I had, and it was still thick enough for me.
  • Ingredients
  • 1 cup milk
  • 1 Tbsp. gluten-free flour (or cornstarch)
  • 6 egg yolks, beaten
  • 2 quarts chicken broth
  • 1/2 cup rice
  • 3-4 Tbsp butter
  • 1/4 cup chopped parsley (or more to taste)
  • 1/2 cup fresh lemon juice (or more to taste)
  • 1 grated lemon rind
  • salt and pepper

  • Directions
    Beat together milk, flour (optional -- if you want a thinner soup, omit the flour), and egg yolks in a bowl and set aside.

    Bring the broth to a boil in a medium/large pot and toss in the rice. Cook for 20-25 minutes. Add in the milk and egg mixture and cook for another minute or two on low heat. Remove from heat, add in parsley, lemon juice, lemon rind, butter, and season to taste.

    Saturday, April 16, 2011

    African Nut-Butter Stew

    This is a recipe that is found, in one form or another, in a number of West African cultures. The traditional dish is a stew primarily with tomatoes and ground nuts. This particular incarnation probably deviates somewhat from tradition, but it sure is tasty.

    Also included here is a recipe for 10-minute vegetable broth. Highly convenient if you don't have any stock around the house. Chicken broth would work here, too, and I've seen this soup prepared with chicken (or other meat, like mutton or lamb) as well.


    [Probably enough for at least 6 servings, but who knows.]
    Ingredients

    1 small onion
    1 large red pepper
    3-4 cloves garlic
    1 (14 oz) can diced tomatoes (do not drain them!)
    6 cups vegetable broth (see 10 minute broth recipe below)
    1/3 cup uncooked rice
    ~1 cup unsweetened nut butter (I used almond)

    Directions
    To make vegetable broth: Chop up 1-2 carrots, 2 celery stalks, 1-2 onions, and 1-2 garlic cloves, or run them through the food processor until they're coarsely processed/grated. Heat oil in a saucepan, throw everything in, and cook, covered, for about 5 minutes. Meanwhile, boil 6 cups of water. Pour water over the veggies and return to boiling, then reduce heat and simmer another 5 minutes. Now strain and you have vegetable broth.

    Finely chop up onion, pepper, and garlic. Heat oil in a dutch oven or saucepan. Throw in onions, pepper, and garlic for a few minutes, browning the onions a bit. Pour in tomatoes and broth and simmer for 10-15 minutes. Now add the rice and simmer until it is cooked through, another 20-30 minutes. Whisk in nut butter, return to simmer, and serve.

    Variation:
    Try adding peas to the soup. Wait until the very end to add them in. We've been storing the soup in the freezer, adding the peas to the portion we're reheating in the pot.

    Monday, April 11, 2011

    Roasted Lemony Potatoes

    The idea for adding lemon slices to a baked dish came, unsurprisingly, from River Cottage Every Day. Turns out roasted lemons are delicious!

    The amounts in this recipe, as in most others suggested on this blog, are very approximate. It's all just about how much of a meal you want to have, whether you want leftovers, how lemony you want your potatoes to taste, etc. It's also approximate because I don't weigh or measure things when I toss them together, so this is just a guess. The good news is that it makes no difference whatsoever.

    [Serves 4-5 as a side dish.]
    Ingredients
    2-3 pounds potatoes
    1 lemon
    2-3 garlic cloves
    olive oil (not extra virgin)
    salt, pepper, herbs for seasoning
    fresh parsley

    Directions
    Preheat oven to 400F. Soak and wash potatoes, scrubbing off any ground-in dirt, but leaving skin in tact. Depending on the size of the potatoes you can leave them whole or halve/quarter them. I used golden potatoes and quartered them. Boil them for about 5 minutes, until they're still pretty firm but can be pierced with a fork. Pour into a colander of some sort and drain. Slice the lemon thickly, and maybe cut the slices in half if you like. Crush the garlic cloves but leave the skin in tact so as not to over-roast the garlic. Place the potatoes, lemon slices, and garlic in an ungreased baking dish. Season as you see fit (I used some garlicky salt and random herbs & spices -- some oregano, maybe thyme, and other stuff). Pour olive oil generously over the mixture and toss it around with your hands until everything's pretty mixed around.
    Bake until a golden brown crust starts to appear on the potatoes. At about 30 minutes I got too hungry to wait for the browning and I put the potatoes in the broiler for about 2-3 minutes, which did the trick. Remove from the oven and sprinkle with parsley and/or whatever other fresh herbs you like most.

    Sunday, March 27, 2011

    Quinoa Tabbouleh

    This was my first experience making tabbouleh, and it came out great. I don't usually love tabbouleh, and I think using quinoa instead of the more traditional bulgur wheat is what makes this salad better than the usual, at least for my taste buds. This accompanied Asa's falafel, which was amazing.


    [Serves 4-5 people.]

    Ingredients
    2 Tbsps oil
    1-2 tsps ground cumin
    1-2 tsps ground coriander
    1 cup quinoa (I used red quinoa)
    2 cups broth (or 2 cups water + 1 bouillon cube)

    1 large carrot, grated
    1-2 handfuls parsley, chopped
    1 large cucumber, diced
    2-3 tomatoes, diced
    1 green onion, chopped fine
    1/4 cup extra virgin olive oil
    1/4 cup lemon juice

    Directions
    Heat oil in a cast iron skillet. When oil is very hot, toss in cumin and coriander and stir rapidly with a wooden spoon until the spices are dissolved into the oil. Toss on (thoroughly rinsed) quinoa and roast for 4-5 minutes.

    Meanwhile, dissolve bouillon cube in the water (or set broth to boil) in a saucepan. Add in quinoa, cover, and simmer for about 15 minutes, until all the water is absorbed into the quinoa. Put the quinoa into the fridge to let it cool.

    Meanwhile, combine all the other ingredients in a salad bowl. Throw in cooled quinoa. Toss together and serve.

    Falafel - Second Attempt

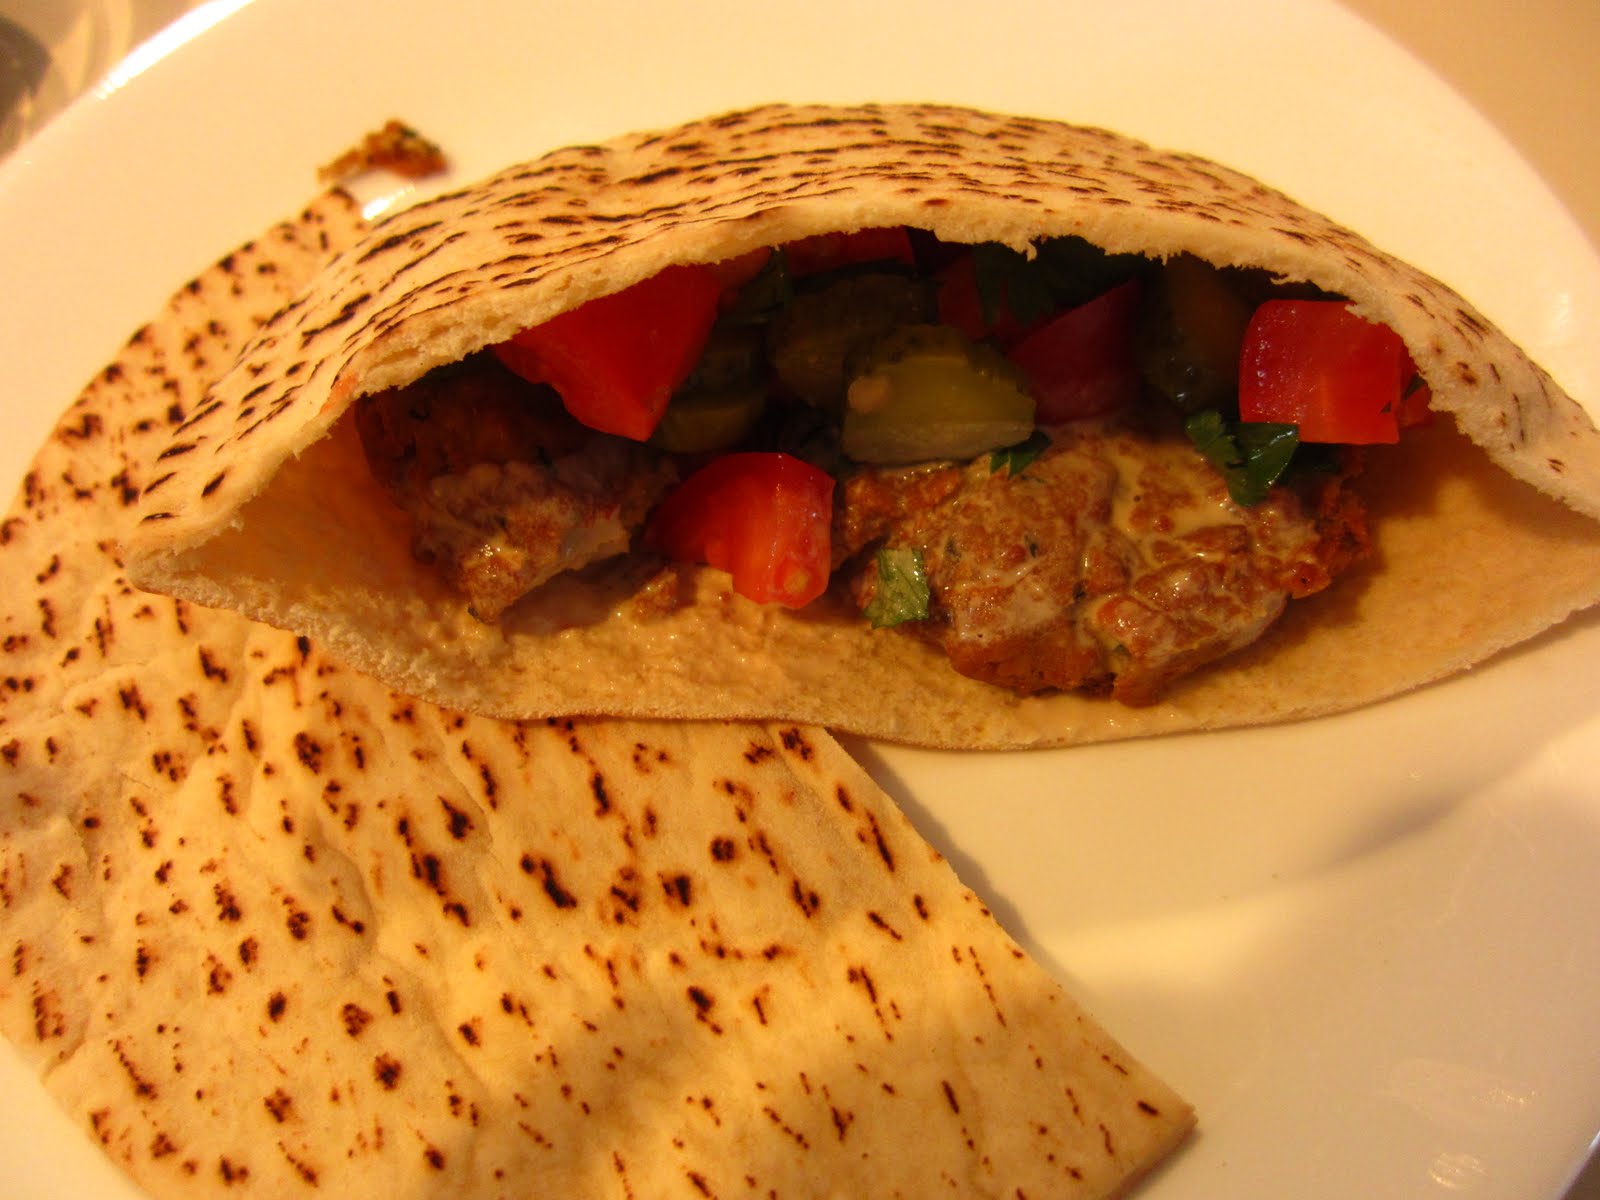
    I tried making falafel for Matt and Anna the other night. The first attempt didn't go so well; the first few patties went in whole but never came out. They didn't stay together and just degenerated into a chickpea crumble at the bottom of the pan. Fortunately Matt was around and suggested adding more flour to the mixture, which saved the day. I was able to cook two batches successfully before the oil turned to chickpea sludge and we had to stop due to health code violations.


    I tried following Alton Brown's recipe:
    1 pound dried chickpeas, sorted and rinsed
    1 teaspoon whole cumin seed
    1 teaspoon whole coriander seed
    2 cloves garlic, coarsely chopped
    4 small scallions, trimmed and finely chopped
    2 teaspoons kosher salt
    1/2 teaspoon freshly ground black pepper
    1 teaspoon aluminum-free baking powder
    1/2 teaspoon cayenne pepper
    2 tablespoons chopped fresh parsley leaves
    2 quarts peanut oil
    Pita bread, warmed, for serving
    I made a few adjustments: I used 3 cans of chickpeas instead of soaking my own pound. I used soybean oil instead of peanut oil and finally I added about a cup of fava bean flour to dry out the mixture. I just kept adding the flour until the mixture had the texture of cookie dough and then fried 'em up!


    To actually make the mix you just put the oil in a pot with tall sides (to avoid spill over of hot oil; I learned that this is pretty important) and heat it to 350 degrees. In the meantime put all the other ingredients other than the flour in a food processor and pulse until there are no more whole chickpeas. Add in the flour, mix with your hands, and form into the shapes you want to fry! I made patties that were about an inch and a half in diameter. Then to cook just put gently in the oil and cook until golden brown. For me this took about 7-8 minutes.


    For sides and dressing I cut up some cucumbers and tomatoes, added some parsley, and put that in one bowl. In another I put chopped pickles, in another yogurt mixed with chopped parsley and finally one with tahini mixed with lemon juice.To make a falafel I took a pita, put in some cooked falafel and then add pickles (a must!), some tomato/cukes and either tahini sauce or yogurt sauce. They turned out pretty good and were really easy to make :)