Showing posts with label quick snack. Show all posts

Friday, January 16, 2015

Cheesy buttermilk biscuits


I love biscuits. I mean, to an unhealthy degree. Someone mentioned the word "biscuits" 3 days ago, and this ravenous part of my brain turned on and wouldn't shut up about how badly I need to bake and eat some biscuits right this second. And it wasn't even the relevant context: they were asking if they could give my dogs biscuits.  

I don't know how I waited 3 days before making them, but it happened, and it made the biscuits that much more delicious. No wait. It didn't. Because biscuits are the maximum amount of delicious already. 


Now that we're clear, here's a biscuit recipe. It is mostly adapted from the classic Joy of Cooking, with the addition of some cheese.

Ingredients
1 3/4 cups flour
3/4 teaspoon salt
2 teaspoons baking powder
1 teaspoon sugar
1/2 teaspoon baking soda
5 Tablespoons butter
3/4 cup buttermilk (or just put about a tablespoon of lemon juice into 3/4 cup milk)
1/4 cup grated parmesan
1/4 cup grated cheddar

Procedure
Preheat oven to 450F. Combine the flour, salt, baking powder, sugar, and baking soda in a large bowl. Cut in the butter (either with a pastry cutter or just with a knife). Keep chopping the butter up until it's as small as you're willing to get it. Pour in the buttermilk and the parmesan and mix lightly, just until you more or less have something you can call dough.

Turn the dough out onto a floured work surface. Knead gently for 20-30 seconds. Using your knuckles, pat the dough down to about 1/4 - 1/2 inch thickness. (Obviously the thicker the dough, the thicker the biscuit. I like mine pretty thick, but you may not. Play around with it if you're not sure.) Cut circles into the dough (I used the small end of a plastic funnel for canning; I've also used the rims from Ball jar lids). Place onto a foil-lined baking sheet. If you want a little cheesy crust on top, sprinkle the cheddar on top. Bake for 8-12 minutes, or until the biscuits are just starting to get golden on top.


Cut them in half, lengthwise, and add a thin pat of butter in the middle. Enjoy with some pork chops, tea and jam, or literally every other thing.


Thursday, June 26, 2014

Simple frozen dog treats


This is probably the single easiest "recipe" (if we can even call it that) that I'll ever post here. This recipe requires 4 things:

  1. Yogurt
  2. Peanut butter 
  3. Silicon ice tray for easier treat removal
  4. Dog(s) (optional)
In more detail...

Ingredients
[makes 6 treats]
  • ~1/2 cup plain, non-fat yogurt
  • ~6 teaspoons peanut butter
Procedure
Fill each cup in an ice tray about halfway with yogurt. Put about a teaspoon of peanut butter on top of the yogurt. Fill the rest of the cup with yogurt. Freeze. Done! 

For a somewhat slushy treat, only freeze for about 15-20 minutes. On a particularly hot day, freeze it all the way. Will last in the freezer for just about ever. Use Doctor Who themed ice tray so everyone knows you're a nerd.


This post brought to you by our A/C breaking.

Saturday, March 22, 2014

Easy fridge pickles


This recipe works for just about any vegetable that you have going to waste in the back of the refrigerator. We did it with baby red peppers and string beans, and they turned out really delicious. We'll definitely be doing this with other veggies in the future, too!

Ingredients
[Makes enough to fill 3 quart-sized Ball jars]
~ 3 lbs. string beans, peppers, and/or whatever other veggies you want to pickle
3 cups vinegar
3 cups water
4.5 Tbsp. pickling salt
6 cloves garlic
6 Tbsp. dill seed


Procedure
Clean the jars in boiling water to disinfect. Put the garlic and fennel seeds into the bottoms of the jars.

To make the brine, combine the vinegar, water, and salt in a large pot until the mix comes to a roiling boil. While that's heating, put the veggies into the jars on top of the spices. Try to pack them in pretty tight. You may need to trim the beans if you're using pint jars or the veggies are particularly long, but I didn't find this to be an issue in the quart jars.

Pour the brine over the veggies, leaving about a 1/2 inch at the top. Stir a little bit to remove any air bubbles, put on the lids, and stick the pickles in the fridge for about a week (for full flavor). That's it!


Storage
These will last for a while (at least several weeks) in the fridge.

If you've canned stuff (like jam, or "real" pickles, or tomatoes) in your life, you probably know that there are more particular steps to be followed. One thing that's so great about this recipe is how easy it is, because the pickles last for a long enough time in the refrigerator to render serious canning unnecessary. But if you do decide to can them, this recipe will still be perfectly fine---you're just on your own for the canning procedure. This is what happened when we tried to do it:


And no. This is not our first attempt at canning. Maybe some people just aren't meant to be able to make pickles that can be stored indefinitely at room temperature. 

Variations
You can add red chili flakes for a bit of a kick, but as our household average spice-wussiness level is quite high, we haven't tried. 

Thursday, May 16, 2013

Mini Meat Pies


Following our Game of Thrones themed birthday party, we had an insane amount of leftovers. The small amount of lamb still leftover two weeks later was easily dispatched by our dogs (they liked it almost as much as when they got to devour blue cheese filet mignon last week -- yeah, these dogs are ridiculously spoiled). The only thing left was a bit of rabbit stew. Super delicious and made by my mom -- who will perhaps post a recipe here one day?!

So today I finally got off my butt and decided to use our leftovers for good! And hence rabbit muffins. Or... Stew scone? Bunny bread? Carcass cupcake? Yeesh, okay, I'll stick with mini meat pies.


Ingredients
Leftovers
Pie crust

Pie Crust
[For 12 mini pies.]
2 cups flour
2/3 cup shortening
1 tsp salt
~1/2 cup cold water

Procedure

Mix flour, salt, and shortening together using a pastry blender until you have a fairly homogenous crumbly mixture. Add in water, a little bit at a time, and stir with a wooden spoon until the dough forms a ball. Roll it out (depending on your work surface, you may want to roll out half of it at a time) pretty thin line the bottoms of a greased muffin tin. Spoon in your leftover filling (any thick stew would work, as would anything that's not too runny).


 Cover the filling with another layer of dough, crimp the edges with a fork, and glaze with a bit of egg wash. Bake at 425F for about 15-20 minutes, or until the pie is slightly golden on top.


When you're splitting up the dough into the muffin cups, neatness is not very important. Just rip out a portion roughly large enough to go into the cup and stick out a over the sides. Same for the top. All that matters is you can crimp the edges to seal in the meaty goodness.

* Dog approved!

(Taken with a pie held over the camera. Don't feel bad, he got to eat it after.)

Storage/Leftovers
These will not be great re-heated, so only make the amount you plan to eat. Remaining uncooked dough can be frozen.

Monday, April 15, 2013

Stove-top Flatbreads

This recipe comes from River Cottage Every Day, like a couple of others on this blog. I love it because it is fun and extremely easy/fast. We had it with Indian food the other day, and it served admirably in place of naan. Extra bonus points for being something we can literally throw on top of the wood stove when it's heating the house anyway.

Ingredients
[makes 8 individual flatbreads]
1 3/4 cups flour
1 tsp salt
1 Tbsp canola/vegetable oil
2/3 cup warm water

Procedure
Lightly flour your counter/cutting board/whatever. Combine salt and flour in a bowl. In a separate container, add the oil to the warm water. Pour the oily water into the flour in a thin stream, mixing it in as your pour, until the mixture is a more or less homogeneous dough.

Knead the dough with your hands on your floured work surface for about 5 minutes. (You can use the dough hook on your KitchenAid or whatnot instead, but that's not nearly as fun. And probably won't save you any time or effort when you factor in the extra dish washing.)

It will feel pretty elastic after 5 minutes. Let it rest underneath the overturned bowl for about 15 minutes.

This bread will be much, much better hot, so don't cook it until you're ready to eat. (The rolling process will take about 5-10 minutes and the actual cooking process will take about 2.) When you're about ready to eat, roll the dough into a long sausage and divide it into 8 equal pieces. Keeping the surface pretty floured, roll each piece into a ball with your hands and then roll it out with a rolling pin into a circle (more or less) about 1/8" thick. If they're a bit thicker, that's okay too -- you'll have a slightly chewier bread.


(Note that if you aren't going to be cooking all of the pieces, you can freeze them after you roll them out. For more on that, see the bit about storage, below.)


If you have a woodstove going nice and hot, wipe that clean. If you're not so lucky, heat a cast-iron pan quite hot, then turn the heat down a bit. Ready a plate lined with either a clean tea towel or a double layer of paper towel.

Shake off excess flour and toss the bread onto the pan/stove. After about 2-3 minutes, the dough will start to look a bit hard (or "set" as Fearnly-Whittingstall calls it) on top. Flip the bread over. If it doesn't have nice golden brown patches, flip it back over and give it another 30 or so seconds and try again. (Do not exceed 3-4 minutes though.) Cook it another 45 seconds on this side, and then place it between the towels on your plate to keep it warm and soft.

Eat immediately!


Storage
You can store uncooked dough in the freezer for a long time. To store it, roll out fresh dough and place on a piece of wax paper. Layer however many breads you want to store in between pieces of wax paper and place them in a plastic bag.

Recycling
As Fearnley-Whittingstall points out in the book, if you do end up with some unused and already cooked breads, they won't be that great once they cool. But you can turn them into crackers by brushing them with some herbs/spices and oil, tearing them into smaller pieces, and heating them in the oven at 425F until they get crispy to your liking. Breads brushed with oil mixed with some oregano go well with Mediterranean dishes (like a side for a Greek salad or some stuffed grape leaves).

Sunday, April 14, 2013

Peanut Butter Cups

I have had a bad craving for peanut butter covered in chocolate. Seriously guys, it has been unbearable. I went so far as to buy a peanut butter Twix at a gas station late at night but it didn't satisfy the craving. Because it was gross. 

Yesterday, we decided to go to the store to try to get some good chocolate (in particular, I had tried a piece of Lake Champlain's peanut butter filled milk chocolate a few days ago, and I figured no imitation would do to fill the hole in my soul left by not eating more of that bar). And of course, the store was closed by the time we got there. So I finally took matters into my own hands and put this together.

My soul is whole once again. 


Ingredients

  • 1 cup chocolate chips
  • 5 Tbsp butter
  • 3 Tbsp unsweetened peanut butter
  • 1 Tbsp powdered sugar
  • 1 Tbsp butter
  • pinch of kosher or coarse sea salt

Procedure
In a double boiler, melt the chocolate chips and (5 tablespoons) of butter together. (See link for more fun with dipping chocolate.) 

Meanwhile, combine the other ingredients (peanut butter, powdered sugar, and 1 tablespoon of butter) in a cup and microwave until soft but not liquidy (took about 50 seconds for me; check the cup after every 20 seconds). 


Prepare something to make the peanut butter cups in. I lined a mini muffin tin with foil, which is convenient because you can pop the foil cups out after you form them. 

Pour in a bit of chocolate to each cup and let it set (about 2-3 minutes in the freezer). Add in about a teaspoon of peanut butter filling, and top with another layer of chocolate. 

Sprinkle just a pinch of salt on top, and put the cups into the fridge to set. They'll be ready in about 15 minutes. If you're in a big hurry, toss them in the freezer for about 5 minutes. 


Note:

How much peanut butter or chocolate goes into each layer is up to you -- if you want a thin layer of chocolate, add only a bit and spread it around evenly. If you want lots of chocolate surrounding the peanut butter, thicken the chocolate layers accordingly. 


Wednesday, April 20, 2011

Avocado Pile

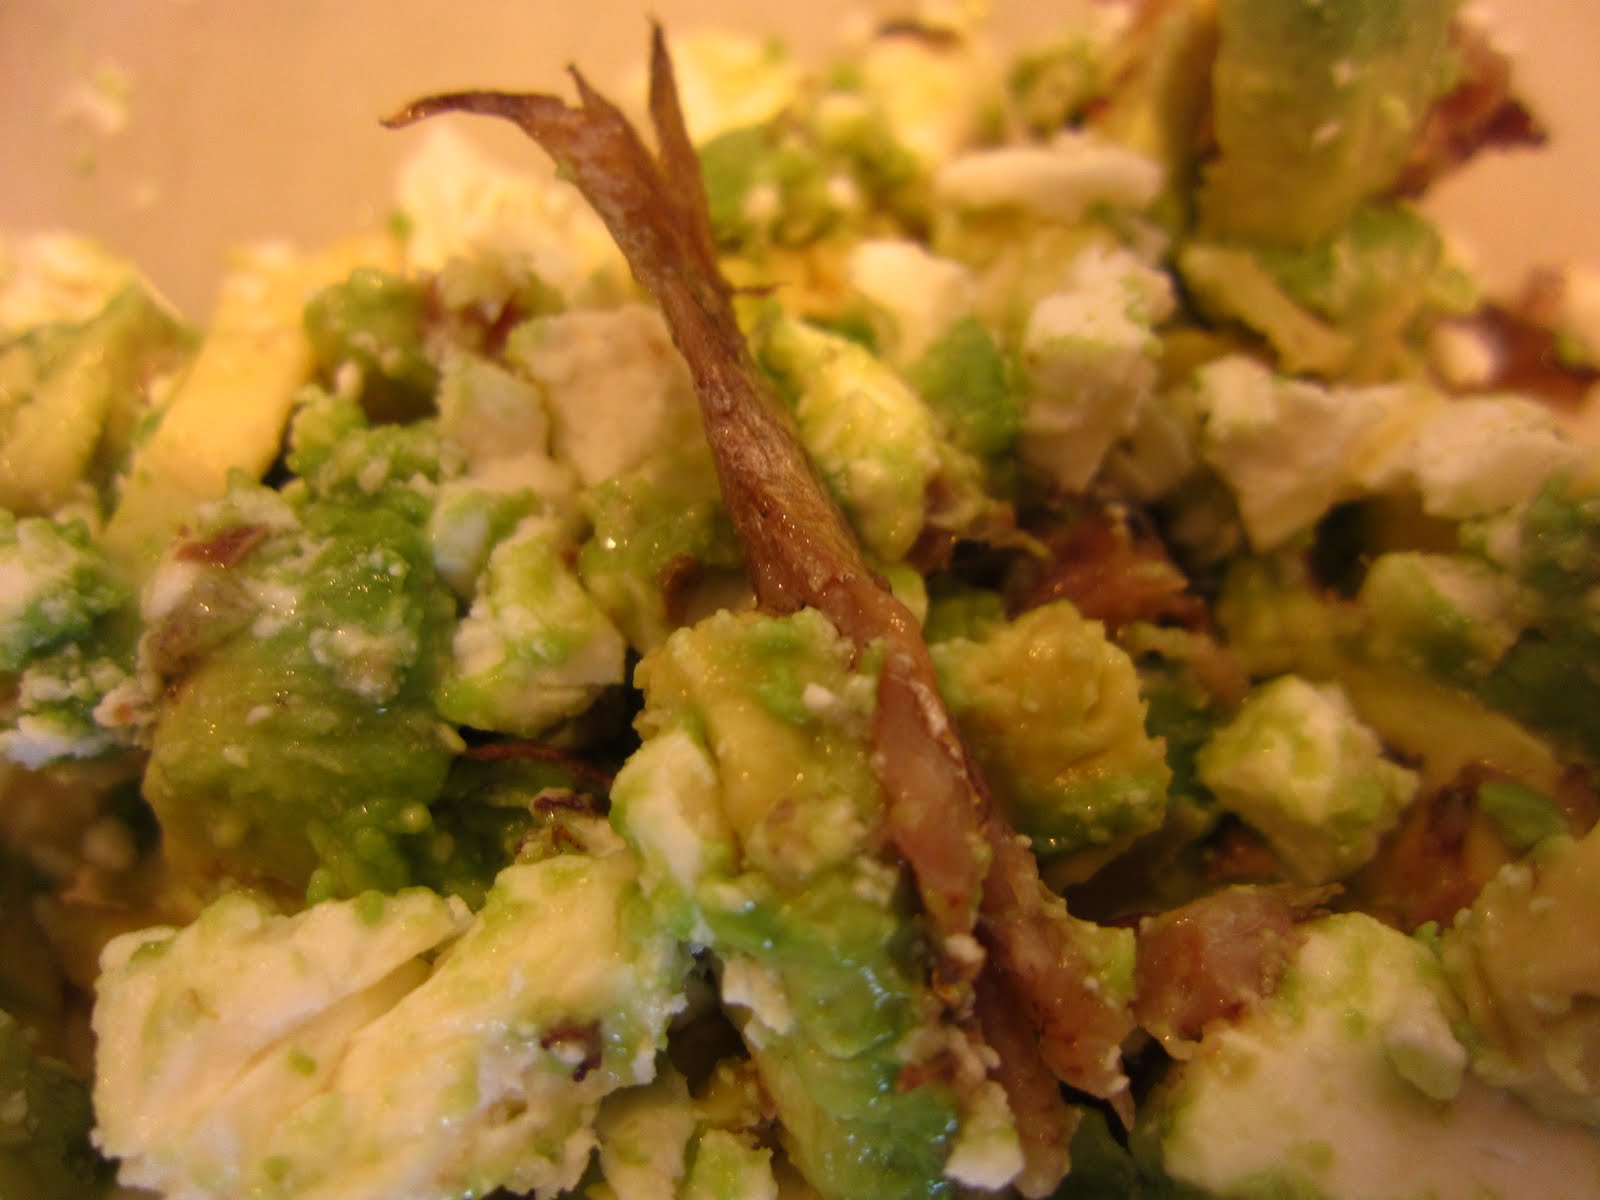
When I was a kid/teenager, my dad often made these "avocado sandwiches" for breakfast. They're more piles than sandwiches, but that's what I always called them growing up for some reason. He also added salmon caviar, which I don't have at my disposal anymore now that I live in a rural area with no Russian immigrants in it. He'd also frequently add in leftover salmon if he'd baked some the previous day, which is surprisingly delicious cold. The salmon adds a beautiful color to this recipe -- a talent that tinned sardines do not possess. Even so, if you can look past the drab appearance of the fish-in-a-tin that you found in the deserted end of the pantry, it makes for a shockingly delicious (and oh-so-nutritious!) meal.

I'm completely guessing on these amounts, by the way. It doesn't make any difference how much you add of what, so just throw in ingredients until things look and taste right to you.

[Makes two avocado piles.]

Ingredients

1 fresh, ripe avocado
3-4 sardines/anchovies/some other salty fish
1/4 cup feta cheese
2 eggs, poached or medium-boiled (slightly runny yolks)
freshly ground black pepper, to taste

Directions
Get your eggs cooking. If you're poaching the egg, just boil some water in a deep pan and crack the eggs carefully into it. Flip the egg over halfway through, and remove the egg just after the whites have been cooked. If you don't mind running egg whites, which I find gross, then you can remove them even earlier! If boiling, put the eggs in cold water and cook over medium heat. After the water has been boiling for just under 2 minutes (though the exact amount depends on how much water you used -- the more water, the faster the egg cooks), pour the water out and run the eggs under cold water; peel.

Meanwhile, cut avocado in half and remove the pit. (The best way to do that is to give it one firm chop with a sharp knife and then gently rotate the pit. It should come out easily as you pull the knife away.) Carefully slice up the scrumptious green meat into cubes


Using a fork, scoop the avocado out into a bowl, but reserve the shells for serving. Crumble up the feta and add it to the bowl, along with the fish. Grind in pepper (and whatever other seasoning floats your boat) to taste. Chop up the (hopefully slightly runny) egg and toss it on. Serve inside the avocado shells.

Variation
: Try the original -- replace the canned fish with salmon, either smoked or leftover from whatever method of preparation you prefer (baked, fried, grilled...). In this variation, remember to squeeze some lemon juice in the mix.

Wednesday, April 13, 2011

Nutty Energy Bars

This recipe came from River Cottage Every Day, unsurprisingly. I made a few adjustments on the basis of lacking ingredients or not liking certain things (e.g. using almond butter instead of peanut butter). In the end, I thought it was a little too sweet, so next time I would use maybe 1/3 cup of brown sugar and 2-3 tablespoons of honey. A suggested variation in the book is to use a mashed ripe banana in place of the nut butter, but I haven't tried that yet.

As you can see, my attempt at these bars gave me an odd pattern -- I tossed the seeds over the top and the mixture started bubbling when it came to a boil in the oven, and evidently it came up over the sides. I think it's pretty neat -- plus the edge pieces have no seeds, for added variety.
:)

Ingredients

1/2 cup butter
1/3 cup raw, unsalted, unsweetened nut butter (I used almond butter)
1/4 cup honey
2/3 cup (packed) brown sugar
little bit of lemon zest (grated)

1 1/4 cups rolled oats
1 cup mixed seeds
1/2 cup raisins
1/2 cup (or less) chocolate chips

Directions
Preheat oven to 325F. Melt first five ingredients in a saucepan over very low heat, stirring occasionally. Add in the oats, raisins, and about 3/4 of the seeds. Mix together.

Grease an 8" baking dish and line with parchment paper (so that it's easy to remove the concoction after baking). Pour in "batter," smoothing it out on top. Scatter chocolate chips and remaining seeds on top.

Variation: I added half of the chocolate chips directly into the saucepan to have a more chocolatey base.

Bake for about 30 minutes. For me, the stuff came out pretty much liquid, which figures as there aren't a lot of solid (when heated) ingredients. Put it in the fridge until it cools completely -- it'll be pretty much rock hard by then. :) Store in the fridge, and eat at a little lower than room temperature so everything doesn't goo up in your hands.

Monday, April 11, 2011

Stuffed Tomatoes

I was looking through a cookbook on Middle Eastern food for inspiration when I came across a recipe for Tunisian stuffed tomatoes. Those call for olives and capers, which I really dislike, as well as preserved lemons, which I don't have. So this is a departure from the Tunisian traditional, but we loved it. Try it with lemony potatoes for a light dinner. Or just make the stuffing part as a quick spiced-up version of a tuna salad for lunch/snack.

Ingredients
2-4 medium tomatoes, firm but ripe
2 red peppers
1 can tuna (chunk light -- not albacore!), drained
1/4 cup parsley, chopped up, stems removed
1-2 tsp. lemon zest, grated

Directions
Roast the peppers. This is the most fun part. If you have a preferred method for pepper-roasting, do that and skip to the next paragraph. I like to do it the Alton Brown way -- directly over a gas burner. Put the peppers (one per burner, if you're doing more than one at a time) directly on the metal grate above the burner and turn with tongs every couple of minutes until you get an even char on the skin. (You'll remove that part, so don't worry.) Then put the hot, charred pepper into a bowl and cover with a plate. Let it sit until it cools, about 15 or so minutes. This will steam the pepper inside its skin.

Preheat the oven to about 350F. Combine all the other ingredients in a separate bowl. When the peppers are cooked through and cool enough to handle, peel off the skin. You should be able to do this easily with your fingers -- it'll come right off. Get all the charred bits off the pepper, and pull the pepper apart to reveal the seeds inside. Depending on how cooked through your peppers are, this may be messy. Get all of the seeds out, and then cut the peppers into thin strips (whatever size you want to eat inside the tomato).

Now take your tomatoes and cut a small hole into the tops -- reserve the caps. Scoop out all the juice and seeds with a spoon. Now shove your tuna/pepper mix into the tomatoes, replace the caps, place them on a baking dish, and roast for about 20-30 minutes. The tomato should be soft but should still retain its form.

Serve as a side dish or as a main course. Goes well with lemony roasted potatoes. If you have filling remaining, refrigerate and use for the next day's lunch box -- works well as a fresh tuna salad over a bed of baby spinach.