Showing posts with label entree. Show all posts

Thursday, May 16, 2013

Mini Meat Pies


Following our Game of Thrones themed birthday party, we had an insane amount of leftovers. The small amount of lamb still leftover two weeks later was easily dispatched by our dogs (they liked it almost as much as when they got to devour blue cheese filet mignon last week -- yeah, these dogs are ridiculously spoiled). The only thing left was a bit of rabbit stew. Super delicious and made by my mom -- who will perhaps post a recipe here one day?!

So today I finally got off my butt and decided to use our leftovers for good! And hence rabbit muffins. Or... Stew scone? Bunny bread? Carcass cupcake? Yeesh, okay, I'll stick with mini meat pies.


Ingredients
Leftovers
Pie crust

Pie Crust
[For 12 mini pies.]
2 cups flour
2/3 cup shortening
1 tsp salt
~1/2 cup cold water

Procedure

Mix flour, salt, and shortening together using a pastry blender until you have a fairly homogenous crumbly mixture. Add in water, a little bit at a time, and stir with a wooden spoon until the dough forms a ball. Roll it out (depending on your work surface, you may want to roll out half of it at a time) pretty thin line the bottoms of a greased muffin tin. Spoon in your leftover filling (any thick stew would work, as would anything that's not too runny).


 Cover the filling with another layer of dough, crimp the edges with a fork, and glaze with a bit of egg wash. Bake at 425F for about 15-20 minutes, or until the pie is slightly golden on top.


When you're splitting up the dough into the muffin cups, neatness is not very important. Just rip out a portion roughly large enough to go into the cup and stick out a over the sides. Same for the top. All that matters is you can crimp the edges to seal in the meaty goodness.

* Dog approved!

(Taken with a pie held over the camera. Don't feel bad, he got to eat it after.)

Storage/Leftovers
These will not be great re-heated, so only make the amount you plan to eat. Remaining uncooked dough can be frozen.

Wednesday, May 8, 2013

Fiddleheads!


too old!
So I was wandering around in the yard the other day looking for a big stick... as I do. And then out of the corner of my eye, I saw some ferns. Which reminded me, as I get reminded every year, that I have been planning on foraging for fiddleheads for the last five years. But every year, when I am reminded, I'm invariably reminded by the tall, unfurled, mostly full grown ferns that we see all summer, and not by the small, edible (nay, delicious!) young shoots.

That's the problem with fiddleheads. They aren't edible for longer than a few days, or at least that's how it seems to me. They start coming out in spring or even early summer, according to sources on the internet, but at least this year (maybe due to unseasonable heat? it's been near 80 for the last couple of weeks), most of the ones I've seen have already been mostly unfurled.

So I was really excited to see these little edible shoots. SO EXCITED.  

juuuuust right.
To make sure you're picking the right variety of fern, look at the stalk. If it curls inward like a celery stalk, you've got the right one. You can just rip them off -- the bottom bit of the stalk is a bit white, and people claim this part is woodier and not really tasty (I wouldn't know though) so I just ripped above that. When they're young, they'll snap pretty easily.

Before you go nuts, Wikipedia gives some sense that fiddleheads are full of healthy stuff but may also be harmful if ingested in great quantities:
Fiddleheads contain various vitamins and minerals, as well as omega-3 and omega-6 fatty acids. They are a source of antioxidants and dietary fibre.[2] They are low in sodium, but rich in potassium, which may make them suitable for people who need a low-sodium diet.[4]
Fiddleheads may harbour microbes, and should be washed and cooked before eating.[2]
Many ferns also contain the enzyme thiaminase, which breaks down thiamine. This can lead to beriberi and other vitamin B complex deficiencies if consumed to excess or if one's diet is lacking in these vitamins.[5]
Further, there is some evidence that certain varieties of fiddleheads, e.g. bracken (Pteridium genus), are carcinogenic. Ostrich fern (Matteuccia struthiopteris) is not thought to cause cancer,[6]although there is evidence it contains an as yet unidentified toxin.[7]
Though it seems like these types of fiddleheads (ostrich ferns) haven't been known to cause specific health issues, may as well play it safe and only eat a bit at a time.

So now that I've said that, let's move on to the cooking bit. Clean off any of the dried brown leafy bits that may be stuck to the fiddleheads and wash them thoroughly.


Step 1. Steam or boil for 10 minutes.
It seems to be generally accepted that whatever toxins may be in ostrich ferns, you can nullify their effect by steaming the ferns for 10 minutes first.

Step 2. Saute in butter and lemon.
Drizzle a bit of lemon on them and saute in a bit of butter for 2-3 minutes. Drizzle just a little more lemon on top and serve.

Serving suggestion.
Serve on a bed of quinoa with a side of pickled daikon (or whatever happens to be in the fridge when you're serving hungry people a late dinner). Fried egg on top is also delicious.


Monday, May 6, 2013

How to Spit-Roast a Lamb Using Household Items


  • Step 1. Buy a leg of lamb in the city. Put it in your backpack. Run to catch the bus while grotesque animal limb bounces up and down behind you because it's twice as tall as your backpack. Ignore curious looks. Ignore looks in the terminal. Ignore looks in the bus. Ignore looks at the bus stop at home. Bring leg home. Ignore dogs.
  • Step 2. Dig a hole for a firepit in your yard. Move the grass off in one piece so you can replace it later and tell your landlords you have no idea why a perfectly rectangular section of their yard is dead. 


  • Step 3. Build a fire pit after your town's fire warden tells you that it's too dry to safely light a bonfire, but if you're going to cook food on it, then it's okay. Lamb makes everything safer.
  • Step 4. Stick a couple of sharpened dowels through the meat. Ignore dogs. 


  • Step 5.  Start doubting yourself. Introduce structural supports. Use household items like twine and the base of a tiki torch. Bonus points if all your structural supports are flammable.
  • Step 6. Cooking time! Bring the meat to the fire. Ignore dogs.

  • Step 7.  Put the spit on vertical sticks (16" off the fire). Start turning the meat. And don't stop for 4 hours. You had nothing else planned for today, right?
  • Step 8. Introduce increasingly desperate reinforcements (e.g. nails, a clamp, a metal broomstick, more twine).

  • Step 9. Get cocky and decide to clear some dead brush while lamb cooks. Throw pine branches on the fire, getting the fire so hot that you set ablaze the twine with which you wrapped the lamb, and watch helplessly as the meat falls into the raging flames. Rescue the meat and admire the "fire-kissed crust." Pretend this was all part of the plan.

  • Step 10. Bring the lamb to the table. Ignore dogs. FEAST!

Monday, April 22, 2013

Honeyed Chicken with Chickpea Salad (for Game of Thrones feast)


Before we even get to the recipe, I just want to explain how happy I am right now. And to do that, I think you need to understand something about me. Here it is. I love chicken. No, seriously, I love chicken. I love the golden, crispy, salty skin and the tender, juicy meat. I love how chicken can go with almost any meal. But mostly it's that golden, crispy, salty skin. The only downside to chicken, until last night, was that while I've enjoyed many a delicious rotisserie in my day, I've never been able to produce a whole chicken that wasn't either: 
  • partially undercooked, 
  • partially overcooked, 
  • encrusted in an oily, undelicious mush more resembling a burnt latex glove coated in grease than the skin described earlier, or
  • simply tasteless.

That has finally changed! And this in a poorly designed electric oven! So here it is, the maybe not-so-secret secret to delicious baked chicken:
STONES
That's it. Just take some tiles/stones/whatever (make sure they won't explode in the oven -- you can shell out some dough -- har har -- for a legit pizza stone, or get some household tiles from Home Depot; we used some leftover tiles from our hearth). Put them on the very top rack, and place the chicken on the rack below. About an hour later -- voila, feast.


We made this as a practice run for a Game of Thrones-themed feast we will be hosting in a couple of weeks. This one is definitely a go! OK, now I'm done with the fanfare. Here's the recipe, loosely adjusted from A Feast of Ice and Fire.

Ingredients
1 whole chicken (innards removed)
2 Tbsp butter, melted
1 tsp kosher salt

1 cup apple cider vinegar
1 Tbsp butter
1-2 Tbsp honey
1-2 tsp basil
1/3 cup currants (raisins are an okay substitute if you don't have currants, but are sweeter, so adjust honey accordingly)

Procedure
Place tiles/stones on top rack of oven (so that they're generally covering the whole top rack), placing the top rack as high up as it will go. Preheat oven to 450F. Pat the chicken dry and place it in a glass baking dish. Rub all of the skin with the butter and then sprinkle salt evenly, rubbing it in with your fingers as well. Place on the rack below the tiles and bake for approximately an hour, or until the meat in the breast is cooked to at least 165 degrees. I think this took me about 70 minutes in all.

Meanwhile! Combine the other ingredients in a small pot and bring to a boil. Reduce heat to low and simmer, uncovered, for about 20-30 minutes, or until the mixture reduces to about half its original volume. When the chicken is done, add the pan drippings to the pot and simmer for another 5-10 minutes. Pour the resulting gravy over the chicken. Eat with your hands and say dumb medieval-sounding stuff for the rest of the night!

Serving suggestion
Serve with a chickpea salad (adapted from the same book): roasted chickpeas and currants/raisins on a bed of arugula, drizzled with and oil & vinegar dressing.

Reuse & Recycle!
Roasted chicken: the gift that keeps on giving. When you're done feasting, slice off any remaining meat from the carcass. This will be delicious in a sandwich or salad over the next few days. (Pictured: grilled sandwich with chicken breast, roasted chickpeas, muenster cheese, tomato, arugula, and spicy brown mustard.)

Save the carcass for making stock. You can dump the entire carcass into a big stockpot along with an onion or two and a few carrots, cover with water, and simmer, covered, on low heat for a good long while.

Sunday, April 14, 2013

Pasties (also: an easy puff pastry recipe)


Another experiment brought about because of River Cottage Every Day, even though all we used of that book here was the recipe for cheaty puff pastry. Cheaty because it isn't as complicated as "real" puff pastry, but I couldn't tell the difference between this and any other puff pastry I've tried, especially on those pasties in which the dough wasn't rolled out too thinly.


Puff pastry 
[Makes 6-7 pasties]
2 cups flour
pinch salt
2/3 cup butter, chilled and chopped into small cubes
ice water

[I would recommend adding more salt!]

Procedure
Sift the flour and salt together in a large bowl. Throw in the cold chopped up butter and toss until all the butter chunks are covered with flour. I found it easiest to do this with my hands. Add the water a couple of tablespoons at a time, mixing it in with a wooden spoon, until you have just enough liquid to make a firm dough. The butter is still in chunks at this point.

Shape the dough roughly into a rectangular prism with your hands and put it on a well-floured surface. Flour a rolling pin and roll the dough out in just one direction (away from you is easiest) until it makes a long, flat rectangle -- about 3/8" thick. Fold the top third down and the bottom third up over that (like a letter) so that you have a rectangle that's three layers thick. Rotate 90 degrees and repeat the process. Roll out, fold, and rotate a total of six times. Then cover the dough with plastic wrap and put it in the fridge to rest for at least 30 minutes.

Meanwhile, prep the fillings (see below for some examples). When ready, preheat the oven to 375F and pull out the chilled dough and roll it out so that it's about 1/8" thick. Use a plate or pot lid to cut out circles (I used a smaller pot lid, which gave me 6-7 pasties from each rectangle of dough). Spoon the dough just off center, and fold the dough circle in half. Brush the edges of the pastry just a little bit with water and crimp them tightly, making sure the filling is sealed in. I think the more you can fit inside, the better it'll taste, but that's up to you. Brush the tops with an egg wash (use 1 egg beaten together with 1 tablespoon of milk), lay on a greased, foil-lined baking sheet, and bake for about 25 minutes or until golden brown.


Fillings 
In this first and unreasonably ambitious experiment, we made four savory and one sweet type of pastie. This is a great medium for shoving it full of whatever leftovers or random ideas you have, so the following filling descriptions are pretty vague -- no exact amounts or instructions. You can figure them out yourself. :) 


  1. Mushroom & Barley
    barley
    chopped mushrooms
    cooked spinach
    onions
    salt
    black pepper
  2. Chickpeas & Curry
    chickpeas
    boiled chicken
    red pepper
    green beans
    potatoes
    curry
  3. Butternut Squash & Chicken
    boiled chicken
    boiled butternut squash, pureed
    potatoes
    raisins (optional)
    onions
  4. Keema Matar

    I made keema last night with this recipe and used the leftovers for this pasty. :)
  5. Butternut Squash, Ricotta, & Raisins

    boiled butternut squash, pureed
    ricotta
    brown sugar
    raisins

Sunday, October 7, 2012

Chicken of the Woods!

OK, so it's been a while. Let's (re)start off with a bang. Or at least with an extremely orange mushroom that tastes like chicken. What! Yeah. We finally found the supposedly plentiful "chicken of the woods" mushroom (a.k.a. Laetiporus sulphureus blah blah whatever look it up). It looks like this:


Some cool things about this mushroom: 
  • dude, would you just look at it?

  • if you find some, you probably find about 20 pounds of it
  • it is impossible to mistake for something inedible
  • it is delicious, keeps for a few days before cooking if necessary (and for a while in the freezer once cooked)
  • it tastes like chicken!
  • you can serve it with shrimp and make some "chicken of the woods/chicken of the sea" joke, probably

Let's get to it, then. First, the prep: it's pretty easy. If the inner part (the part closer to the stalk) is kind of corky/woody, you may want to cut it out and just get rid of it. Don't wash it, since it'll get super soggy (or so they say on the internet). Scrubbing off the dirt is good enough, though. Now, the recipe.

Ingredients
  • 3-4 Tbsp butter
  • 2 cloves garlic, minced
  • 5 cups CHICKEN OF THE WOODS, WOOOO!, chopped into bite-sized pieces
  • salt, to taste
  • 2-4 Tbsp sour cream
  • 1-3 Tbsp chicken stock
Procedure
In a large (non-stick? I dunno, worked well for me) pan, heat up the butter. Throw in the garlic and mushrooms and saute until the mushrooms get a bit reddish/brown -- about 10-15 minutes. When it's ready it'll have the consistency of a tender but not particularly juicy chicken breast; add salt to taste.

The sauteeing may take longer or shorter depending on how old/thick the specimen is, how water-logged it is, whether you actually got L. sulphureus or L. cincinnatus (closely related but a little different), etc. Just use your judgment. I've also heard that if you cook it for 15 minutes and the consistency is far from where you want it to be, just give up. Specimens vary greatly and you've probably got a crappy one. 


At this point, I found the mushrooms to be a little dry, so I mixed in a couple of tablespoons of sour cream with a little bit of chicken stock. You can skip this step if you like the juiciness level as is. 


Can be served as is or if you're looking for a bit more flavor, add in some shrimps (I cooked them the same way as the mushrooms and mixed them all in together).
Definitely going back tomorrow to pick the rest of the mushrooms we found. Will report back eventually on whether our guests get poisoned.

Edit: It's been a day and everyone's still alive. Success! We went back and picked everything off that log:


Monday, April 11, 2011

Stuffed Tomatoes

I was looking through a cookbook on Middle Eastern food for inspiration when I came across a recipe for Tunisian stuffed tomatoes. Those call for olives and capers, which I really dislike, as well as preserved lemons, which I don't have. So this is a departure from the Tunisian traditional, but we loved it. Try it with lemony potatoes for a light dinner. Or just make the stuffing part as a quick spiced-up version of a tuna salad for lunch/snack.

Ingredients
2-4 medium tomatoes, firm but ripe
2 red peppers
1 can tuna (chunk light -- not albacore!), drained
1/4 cup parsley, chopped up, stems removed
1-2 tsp. lemon zest, grated

Directions
Roast the peppers. This is the most fun part. If you have a preferred method for pepper-roasting, do that and skip to the next paragraph. I like to do it the Alton Brown way -- directly over a gas burner. Put the peppers (one per burner, if you're doing more than one at a time) directly on the metal grate above the burner and turn with tongs every couple of minutes until you get an even char on the skin. (You'll remove that part, so don't worry.) Then put the hot, charred pepper into a bowl and cover with a plate. Let it sit until it cools, about 15 or so minutes. This will steam the pepper inside its skin.

Preheat the oven to about 350F. Combine all the other ingredients in a separate bowl. When the peppers are cooked through and cool enough to handle, peel off the skin. You should be able to do this easily with your fingers -- it'll come right off. Get all the charred bits off the pepper, and pull the pepper apart to reveal the seeds inside. Depending on how cooked through your peppers are, this may be messy. Get all of the seeds out, and then cut the peppers into thin strips (whatever size you want to eat inside the tomato).

Now take your tomatoes and cut a small hole into the tops -- reserve the caps. Scoop out all the juice and seeds with a spoon. Now shove your tuna/pepper mix into the tomatoes, replace the caps, place them on a baking dish, and roast for about 20-30 minutes. The tomato should be soft but should still retain its form.

Serve as a side dish or as a main course. Goes well with lemony roasted potatoes. If you have filling remaining, refrigerate and use for the next day's lunch box -- works well as a fresh tuna salad over a bed of baby spinach.

Wednesday, April 6, 2011

Easy Bouillabaisse

This is one of those dishes that look so beautiful and taste so delicious that if you admit how simple the production was, your dinner guests will assume you're being falsely modest. So you may not want to ruin the illusion. ;)


It may look like soup, but it always fills me up as a meal of its own. This stew is quite thick.

Any flaky white fish will do. I've tried this recipe with cod, tilapia, halibut, hake, haddock, and catfish. Maybe my pallet isn't that developed, but I think it tastes great with all of the above, so which fish you want to use is up to you. This recipe is loosely based on this one that appeared in the New York Times, but a number of proportions (and some ingredients) have been altered.

[Serves 3-4 people.]
Ingredients

1/2 cup olive oil (not extra virgin)
2 tomatoes
1 small onion
1 carrot
1 bay leaf
2 handfuls of parsley
3 cloves of garlic
1/2 cup lemon juice
2-4 fish fillets
salt and pepper to taste
1.5 cups broth
1/2 cup white wine
3/4 cup of bay scallops (optional)
3 slices of white bread (I suggest sourdough)

Directions
Blanch tomatoes (i.e. place them in boiling water for about 5 seconds each, then run them under cold water), which will make it very easy to peel them. Peel, seed, and dice tomatoes. Thinly slice onion and carrot. In a (preferably cast-iron) dutch oven, heat oil until it's beginning to sizzle. Add the prepared tomatoes, onion, carrot, bay leaf, and one handful of parsley. Stir with a wooden spoon/spatula for a minute or two. Crush one clove of garlic and add it to the pan, and cook for about another minute.

Place the fillets (if you want to have a thicker stew, add more fillets accordingly) in the dutch oven -- in one layer, or as close as you can get it. Add the lemon juice, salt, and pepper, and boil the fish for 10-15 minutes, flipping the fillets once halfway through.


While the fish is cooking, prepare the bay scallops. This basically means rinse them under cold water, and then make very sure that they are dry -- pat them down carefully with paper towels until they're completely dry. Melt a tablespoon of butter on a (preferably cast-iron) skillet. Dice one of the garlic cloves and add it to the butter. Making sure that pan is very hot, throw on the scallops. Don't stir them around too much, so that they have a chance to brown nicely on every side. It's easy to overcook scallops, so about five minutes should do the trick. Remove scallops from heat and set aside.

Back to the stew! You can use chicken broth if you want the stew to have a less fishy taste, or fish broth if you're going full-on. If I'm lazy and out of homemade stock, I just use one bullion cube and 1.5 cups of water. Add broth and wine to the stew. Simmer until the fish is just cooked through -- it'll be flaky and come apart easily.

Meanwhile, toast the bread. Rub with butter and the third garlic clove and place on the bottom of the serving bowls.
Toss remaining parsley into the dutch oven. Ladle over the toasts, and top with browned scallops. Eat immediately!

Sunday, March 27, 2011

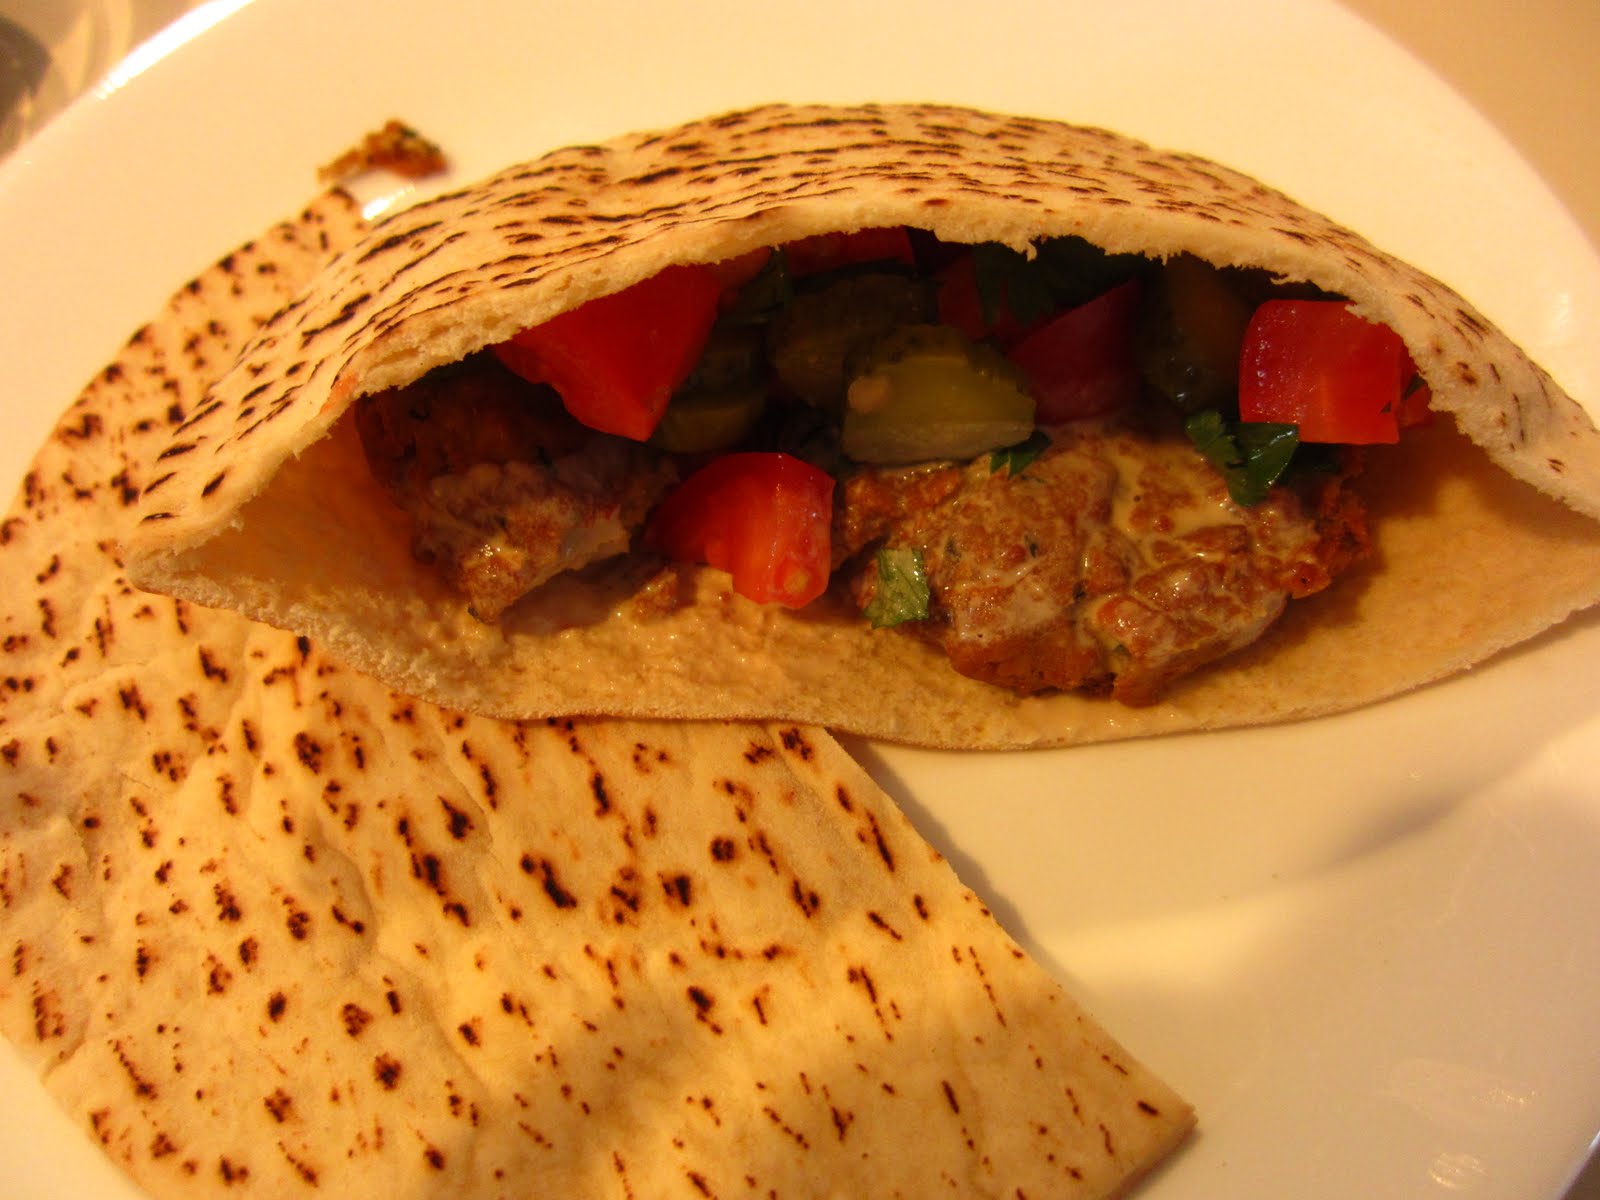
Falafel - Second Attempt

I tried making falafel for Matt and Anna the other night. The first attempt didn't go so well; the first few patties went in whole but never came out. They didn't stay together and just degenerated into a chickpea crumble at the bottom of the pan. Fortunately Matt was around and suggested adding more flour to the mixture, which saved the day. I was able to cook two batches successfully before the oil turned to chickpea sludge and we had to stop due to health code violations.


I tried following Alton Brown's recipe:
1 pound dried chickpeas, sorted and rinsed
1 teaspoon whole cumin seed
1 teaspoon whole coriander seed
2 cloves garlic, coarsely chopped
4 small scallions, trimmed and finely chopped
2 teaspoons kosher salt
1/2 teaspoon freshly ground black pepper
1 teaspoon aluminum-free baking powder
1/2 teaspoon cayenne pepper
2 tablespoons chopped fresh parsley leaves
2 quarts peanut oil
Pita bread, warmed, for serving
I made a few adjustments: I used 3 cans of chickpeas instead of soaking my own pound. I used soybean oil instead of peanut oil and finally I added about a cup of fava bean flour to dry out the mixture. I just kept adding the flour until the mixture had the texture of cookie dough and then fried 'em up!


To actually make the mix you just put the oil in a pot with tall sides (to avoid spill over of hot oil; I learned that this is pretty important) and heat it to 350 degrees. In the meantime put all the other ingredients other than the flour in a food processor and pulse until there are no more whole chickpeas. Add in the flour, mix with your hands, and form into the shapes you want to fry! I made patties that were about an inch and a half in diameter. Then to cook just put gently in the oil and cook until golden brown. For me this took about 7-8 minutes.


For sides and dressing I cut up some cucumbers and tomatoes, added some parsley, and put that in one bowl. In another I put chopped pickles, in another yogurt mixed with chopped parsley and finally one with tahini mixed with lemon juice.To make a falafel I took a pita, put in some cooked falafel and then add pickles (a must!), some tomato/cukes and either tahini sauce or yogurt sauce. They turned out pretty good and were really easy to make :)