Showing posts with label gluten free. Show all posts

Monday, November 19, 2012

Butternut Squash & Almond Soup

This is now the second (edible) soup I've made with almonds. The other one (African nut butter stew) is pretty filling, as vegetarian soups go. This one is much lighter, and is good for a small snack or as a precursor to a glorious almost-in-a-food-coma-while-still-eating dinner (i.e. Thanksgiving). This comes from a friend, LG.

Pictured with Cedar Circle Farm's Trukenbrod whole spelt bread, which is amazing and delicious and you should try it if you live around VT/NH.

Ingredients
1 butternut squash
4-6 cups broth
1 cup almonds
curry powder, to taste
black pepper, to taste

Procedure
Boil about 3 cups of broth. Peel the squash (this is really not too bad if you just use a sharp vegetable peeler -- takes a minute and you don't lose much of the flesh). Cut it into cubes, and put it in the boiling broth. Add as much broth as you need to completely cover the squash. For one medium squash, I used about 5 cups of broth (not including the 1/2 cup that comes later; see below) and got a thin soup, which was delicious and not as heavy as squash soup usually feels. Lower the heat and simmer, covered, until the squash is completely cooked through -- about 10-15 minutes.

Meanwhile, blanch the almonds (i.e. pour boiling water over them and let sit for a minute). Rinse with cold water until they're cool, and peel the skins off. They should pop off pretty easily at this point. Put the peeled almonds with about 1/2 cup of broth into a food processor, and process until the nuts are as finely processed as you'd like to have in your soup.

When the squash is cooked, remove it from the broth (don't toss the broth!) and process it with the almonds. When it's all pureed (or to whatever chunkiness level you prefer), add the almond and squash puree back into the broth and mix everything together thoroughly. You may want to use a hand mixer or immersion blender if you have one, but a whisk would do the trick as well.

Serve hot. Keeps for a while in the fridge, though the puree may start to separate a little when it sits.


Sunday, November 18, 2012

Two kinds of dog treats


The Obscenely Healthy Dog Treats

We're out of dog treats and we're going on vacation next week so we have to use up a bunch of stuff... hence, healthy dog treats. They look kinda gross, but they're healthy and (at least our) dogs go nuts for them. One of our dogs stole two treats before I even got them in the oven, though he also steals whole bags of hot dog buns, so that rave review is kind of irrelevant. We tried them ourselves and they're actually human-tasty, too. They're also pretty easy to make, given that you have a bunch of veggies and some meat lying around. You can replace the ingredients with anything dog-friendly (the ASPCA has a list of foods to avoid, and you can find others online/ask your vet) that has roughly the same texture. Here's what we did.

Ingredients
(Makes about 50 small treats)

  • 1 cup ground meat (we used leftover kotleti, which is very roughly something like this, but that's neither here nor there; any meat will do, including uncooked ground meat)
  • 2 medium carrots, shredded
  • 2 stalks celery, finely diced
  • 1/2 cup spinach, steamed and drained
  • 1-2 tsp. dried parsley (or 1-2 Tbsp fresh parsley, minced)
  • 2 tsp. turmeric
  • 1 egg
  • ~1 cup flour (add as necessary) -- gluten free flour can easily be subsituted if your dog has a wheat intolerance
Procedure
Preheat oven to 350F. Line a baking sheet with foil and spray with cooking spray (or otherwise grease it up). 

Mix all ingredients together except for flour. Add flour and keep mixing to see how much you need. Mixture shouldn't be so sticky that it's hard to work with, but it shouldn't be nearly as dry as a cookie dough, either. 


If things aren't forming into balls (or whatever cookie shape you desire) then you may want to add a second egg. Once that's all sorted out, shape the mush into whatever shape you like. I made little flattened balls, something like a stack of 3-4 half-dollars in size. 


Place the treats onto the baking sheet and bake for about 15-20 minutes. Let cool completely before feeding to pooches. 


The Far Less Obscenely Healthy Dog Treats
OK, these are pretty good too. I swear I'm not eating my dogs' treats.

Ingredients
(Makes 130-140 small cookies)
  • 2 cups flour
  • 1 cup rolled oats
  • 1/4 cup peanut butter
  • 1 cup chicken broth

Procedure
Preheat oven to 350F and line a baking sheet with foil.

Mix the first three ingredients together in a bowl. Add as much broth as it takes to get to dough-like consistency. Knead the dough on a floured surface until it's thoroughly mixed. Roll it out to the desired thickness (I made cookies roughly 2 coins thick) and use a cookie cutter that's to your liking. I used the top of a pill case because I wanted small biscuits that could be used for training without having to be broken in half. 


With that size of cookie, bake for about 20 minutes -- adjust time according to size. Let cool completely. 

Monday, October 8, 2012

Baked Apples

We went to Moore's Orchard in Pomfret, VT for their last day of apple-picking. The lady there told me that they're closing their orchards to the public even though there are plenty of apples left on the trees for two primary reasons: (1) they'll use the rest of the apples for cider, and (2) the bears can't find wild apples this year and they want to leave enough for them; she said, "they've been hanging out in the orchards every night this season and throwing parties." Living in VT is awesome.

This recipe is really simple. It's roughly what my dad used to make for us when I was a kid as an after-dinner treat. Not gonna lie, though. Today I ate it for breakfast.

Ingredients
(makes 4 baked apples)
4 apples
3-4 Tbsp raisins
2-3 tsp honey
4 tsp scotch/brandy/whiskey/cognac

Procedure
Preheat the oven to 350F. Core the apples, but don't poke through all the way to the bottom, so that you're left with a kind of cup.
Save the tops that you cut off, too, because you're going to put them back on when you bake the apples. Place the apples in a baking dish (a lot of juice might come out, especially if you've accidentally poked a hole in the bottom, so you definitely don't want to do this without one).

Fill apples with whatever sounds good! I love the taste of raisins stewed in apple juice so I put in about a tablespoon of raisins into each apple (maybe less depending on the size of the apple and how large of a hole you cut), and then poured on another 1/2 teaspoon of honey and a bit more than a tablespoon of scotch. Replace the tops and put it on the top rack for about 30 minutes (more if you want them really mushy and falling apart -- after 30 minutes they're well-baked but still maintain some firmness).


They'll come out [not pictured] looking a bit like an old lady who's been in a tub too long [also not pictured], but far more appetizing. Serve with whipped cream or ice cream or just on its own. Probably best when still hot, but I still love it even when it's gotten pretty cool.

Variants
Make it more autumny/wintry by adding spices: heat some cinnamon sticks and cloves (rolled into a cheesecloth or in a spice bag or something so you don't have bits in your teeth later) in a bit of cider. Add honey/liquor/raisins/etc as before, and pour it all in.

Sunday, October 7, 2012

Chicken of the Woods!

OK, so it's been a while. Let's (re)start off with a bang. Or at least with an extremely orange mushroom that tastes like chicken. What! Yeah. We finally found the supposedly plentiful "chicken of the woods" mushroom (a.k.a. Laetiporus sulphureus blah blah whatever look it up). It looks like this:


Some cool things about this mushroom: 
  • dude, would you just look at it?

  • if you find some, you probably find about 20 pounds of it
  • it is impossible to mistake for something inedible
  • it is delicious, keeps for a few days before cooking if necessary (and for a while in the freezer once cooked)
  • it tastes like chicken!
  • you can serve it with shrimp and make some "chicken of the woods/chicken of the sea" joke, probably

Let's get to it, then. First, the prep: it's pretty easy. If the inner part (the part closer to the stalk) is kind of corky/woody, you may want to cut it out and just get rid of it. Don't wash it, since it'll get super soggy (or so they say on the internet). Scrubbing off the dirt is good enough, though. Now, the recipe.

Ingredients
  • 3-4 Tbsp butter
  • 2 cloves garlic, minced
  • 5 cups CHICKEN OF THE WOODS, WOOOO!, chopped into bite-sized pieces
  • salt, to taste
  • 2-4 Tbsp sour cream
  • 1-3 Tbsp chicken stock
Procedure
In a large (non-stick? I dunno, worked well for me) pan, heat up the butter. Throw in the garlic and mushrooms and saute until the mushrooms get a bit reddish/brown -- about 10-15 minutes. When it's ready it'll have the consistency of a tender but not particularly juicy chicken breast; add salt to taste.

The sauteeing may take longer or shorter depending on how old/thick the specimen is, how water-logged it is, whether you actually got L. sulphureus or L. cincinnatus (closely related but a little different), etc. Just use your judgment. I've also heard that if you cook it for 15 minutes and the consistency is far from where you want it to be, just give up. Specimens vary greatly and you've probably got a crappy one. 


At this point, I found the mushrooms to be a little dry, so I mixed in a couple of tablespoons of sour cream with a little bit of chicken stock. You can skip this step if you like the juiciness level as is. 


Can be served as is or if you're looking for a bit more flavor, add in some shrimps (I cooked them the same way as the mushrooms and mixed them all in together).
Definitely going back tomorrow to pick the rest of the mushrooms we found. Will report back eventually on whether our guests get poisoned.

Edit: It's been a day and everyone's still alive. Success! We went back and picked everything off that log:


Friday, May 27, 2011

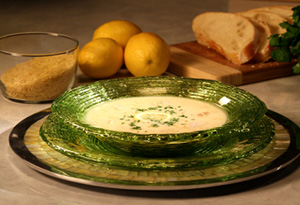
Avgolemono (Greek egg-lemon soup)

This soup is amazing. It's vegetarian, gluten-free, easy to make, and really refreshing on a hot day. You can vary the thickness with the milk and butter content -- I halved the milk and butter from the original recipe I had, and it was still thick enough for me.
  • Ingredients
  • 1 cup milk
  • 1 Tbsp. gluten-free flour (or cornstarch)
  • 6 egg yolks, beaten
  • 2 quarts chicken broth
  • 1/2 cup rice
  • 3-4 Tbsp butter
  • 1/4 cup chopped parsley (or more to taste)
  • 1/2 cup fresh lemon juice (or more to taste)
  • 1 grated lemon rind
  • salt and pepper

  • Directions
    Beat together milk, flour (optional -- if you want a thinner soup, omit the flour), and egg yolks in a bowl and set aside.

    Bring the broth to a boil in a medium/large pot and toss in the rice. Cook for 20-25 minutes. Add in the milk and egg mixture and cook for another minute or two on low heat. Remove from heat, add in parsley, lemon juice, lemon rind, butter, and season to taste.

    Saturday, May 21, 2011

    Moist Banana (or pumpkin!) Bread


    I have been meaning to post this recipe for a long time. It has never served me wrong! One day maybe I will remember to take a picture before eating the banana bread, but it's unlikely. :) Though now (October 2014) I've actually managed to take a photo of the pumpkin variation before eating it, so here it is:


    As a warning, start checking the bread after 45 minutes. Sometimes I need a full hour, but usually it's more like 50 minutes. On the other hand, be careful not to lose too much heat from the oven by checking too often, or it'll be dry by the time it's finally baked through. Once you've gotten to know your oven, just use your judgement!

    Ingredients
    3/4 to 1 cup brown sugar 
    1/2 cup butter, melted
    2 eggs
    1 teaspoon vanilla extract
    1/4 teaspoon baking powder
    1/2 teaspoon baking soda
    1 - 1.5 cups flour (depending on your preference)
    3-4 very ripe bananas, mashed - if using frozen, defrost fully beforehand 

    Preheat oven to 375F and grease a loaf pan. Blend together first four ingredients (mixing vigorously with a fork is fine). In a separate bowl, sift together the dry ingredients. Pour the dry ingredients into the wet ones and mix lightly (do not overmix). Fold in the bananas. Pour mixture into loaf pan and bake for 45-60 minutes.

    Variations
    1. Try adding 1/2 cup of chopped nuts and/or dried fruits.
    2. Make it gluten free: replace the 1.5 cups of flour with 1.5 cups of gluten free flour (as always, I recommend Gluten Free Mama's Almond Blend) and add about 1/2 teaspoon of xanthan gum. If you don't have xanthan gum, that's fine -- the bread will come out a little flatter and more dense, but no less delicious.
    3. Pumpkin bread! Replace the bananas with a can of (unsweetened, unflavored) pureed pumpkin.

    Wednesday, April 20, 2011

    Avocado Pile

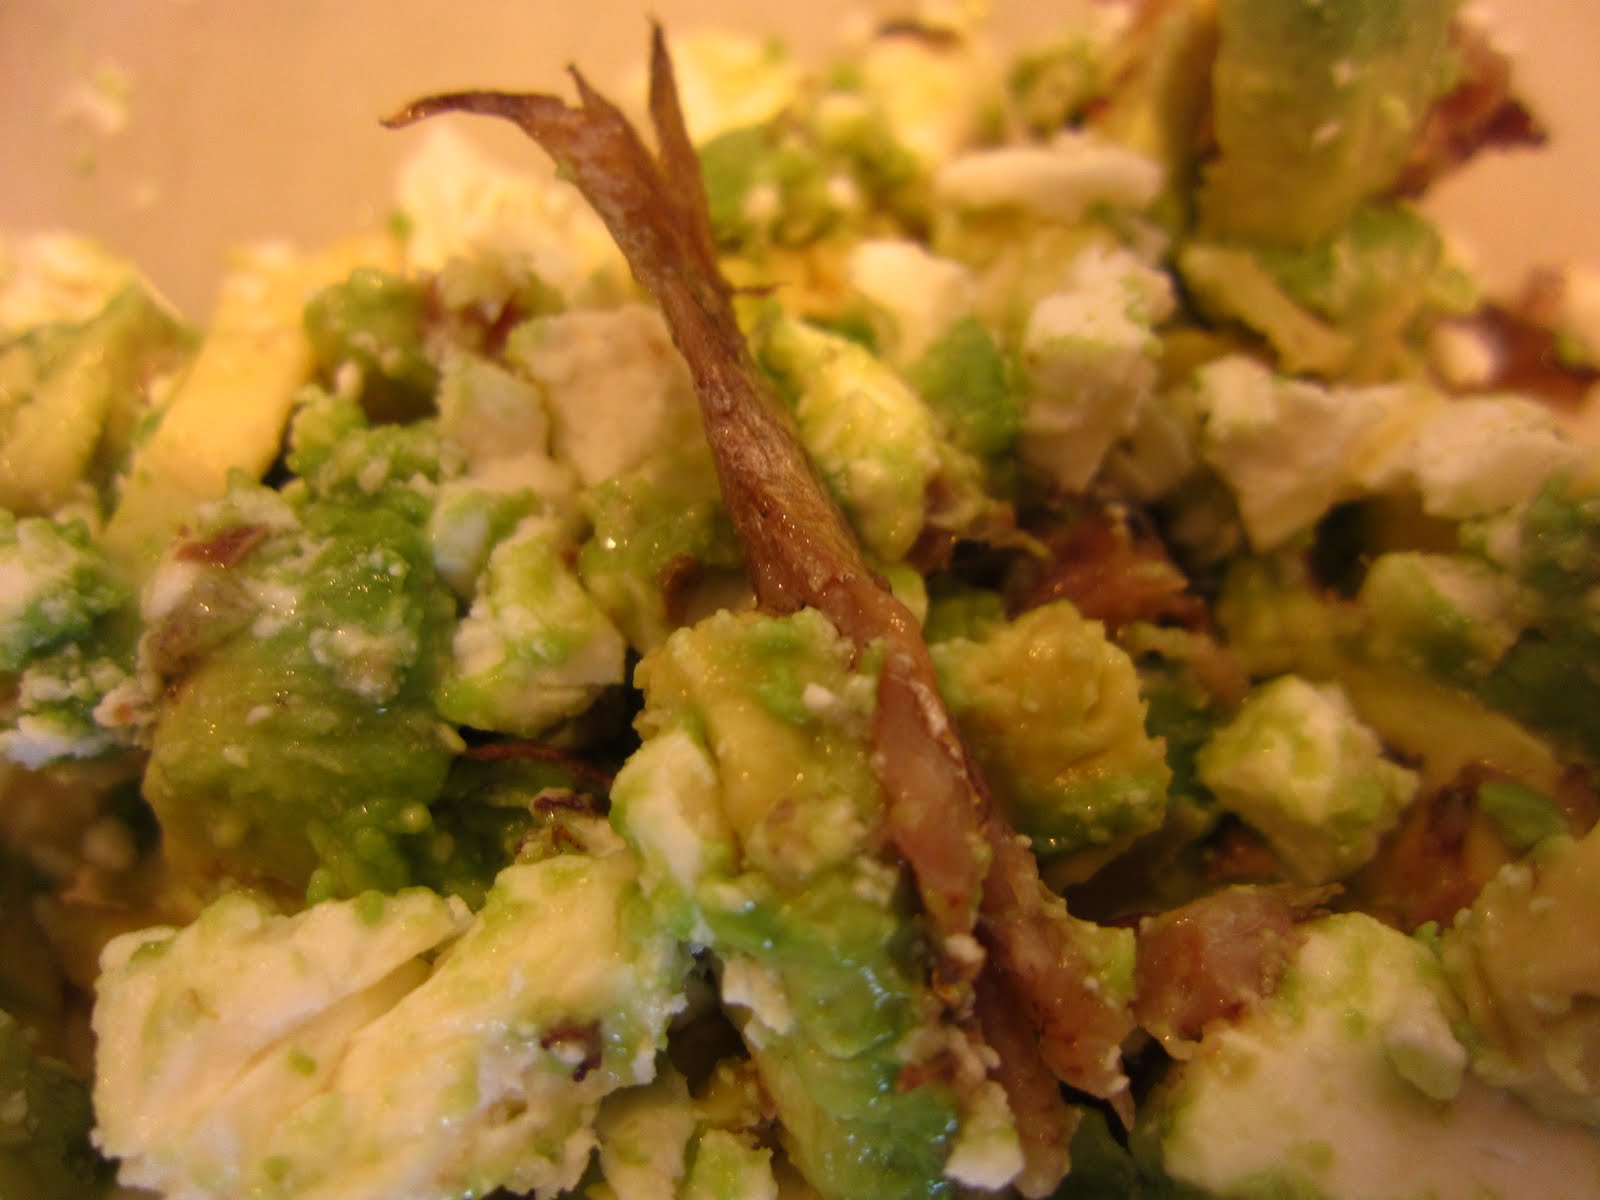
    When I was a kid/teenager, my dad often made these "avocado sandwiches" for breakfast. They're more piles than sandwiches, but that's what I always called them growing up for some reason. He also added salmon caviar, which I don't have at my disposal anymore now that I live in a rural area with no Russian immigrants in it. He'd also frequently add in leftover salmon if he'd baked some the previous day, which is surprisingly delicious cold. The salmon adds a beautiful color to this recipe -- a talent that tinned sardines do not possess. Even so, if you can look past the drab appearance of the fish-in-a-tin that you found in the deserted end of the pantry, it makes for a shockingly delicious (and oh-so-nutritious!) meal.

    I'm completely guessing on these amounts, by the way. It doesn't make any difference how much you add of what, so just throw in ingredients until things look and taste right to you.

    [Makes two avocado piles.]

    Ingredients

    1 fresh, ripe avocado
    3-4 sardines/anchovies/some other salty fish
    1/4 cup feta cheese
    2 eggs, poached or medium-boiled (slightly runny yolks)
    freshly ground black pepper, to taste

    Directions
    Get your eggs cooking. If you're poaching the egg, just boil some water in a deep pan and crack the eggs carefully into it. Flip the egg over halfway through, and remove the egg just after the whites have been cooked. If you don't mind running egg whites, which I find gross, then you can remove them even earlier! If boiling, put the eggs in cold water and cook over medium heat. After the water has been boiling for just under 2 minutes (though the exact amount depends on how much water you used -- the more water, the faster the egg cooks), pour the water out and run the eggs under cold water; peel.

    Meanwhile, cut avocado in half and remove the pit. (The best way to do that is to give it one firm chop with a sharp knife and then gently rotate the pit. It should come out easily as you pull the knife away.) Carefully slice up the scrumptious green meat into cubes


    Using a fork, scoop the avocado out into a bowl, but reserve the shells for serving. Crumble up the feta and add it to the bowl, along with the fish. Grind in pepper (and whatever other seasoning floats your boat) to taste. Chop up the (hopefully slightly runny) egg and toss it on. Serve inside the avocado shells.

    Variation
    : Try the original -- replace the canned fish with salmon, either smoked or leftover from whatever method of preparation you prefer (baked, fried, grilled...). In this variation, remember to squeeze some lemon juice in the mix.

    Saturday, April 16, 2011

    Gluten Free Banana Chocolate Chip Muffins


    This recipe is adapted to gluten free from this one. Which means I didn't do anything very inventive besides lower the amount sweet stuff and put in the right amount of xanthan gum.

    Ingredients
    • 1 3/4 cups your favorite gluten free flour
    • 7/8 tsp. xanthan gum
    • 1/2 cup sugar
    • 1 tsp. baking powder
    • 1 tsp. baking soda
    • 1/2 teaspoon salt

    • 1 egg
    • 1/2 cup vegetable oil
    • 1/2 cup plain yogurt --> important for acidity (some people report good results when using milk, but I still think yogurt is important in this recipe)
    • 3/4 teaspoon vanilla extract
    • 1+ cup mashed ripe bananas
    • 1/2 cup semisweet chocolate chips
    Directions
    Preheat oven to 350F. Combine first six ingredients in a bowl. In a separate large bowl, combine the egg, oil, yogurt, and vanilla. Pour dry ingredients into wet ingredients and fold over until just combined -- there can still be dry bits of flour in it, and that's fine.

    Anyway, fold in the mashed bananas and chocolate chips. Grease muffin tins and fill each cup no more than 3/4 full (depending on how much of a muffin top you want to see in the finished product). Bake for 20-25 minutes. Cool for a little bit before removing from tins, and then transfer to a cooling rack.

    Fun fact: In general, you don't want to overmix muffins or you'll have a tunneling problem: dense muffins with a bunch of holes in them from the air bubbles. (i.e. Use the muffin method, and Alton Brown fans, you know what that means.) But tunneling is created by gluten, a protein composite you don't want to over-excite if you don't want your muffins tasting like bubble gum. Our flour had no gluten to begin with, though, so maybe the muffin method is not as important in gluten-free baking. Does anyone actually know if this is true?

    Wednesday, April 13, 2011

    Nutty Energy Bars

    This recipe came from River Cottage Every Day, unsurprisingly. I made a few adjustments on the basis of lacking ingredients or not liking certain things (e.g. using almond butter instead of peanut butter). In the end, I thought it was a little too sweet, so next time I would use maybe 1/3 cup of brown sugar and 2-3 tablespoons of honey. A suggested variation in the book is to use a mashed ripe banana in place of the nut butter, but I haven't tried that yet.

    As you can see, my attempt at these bars gave me an odd pattern -- I tossed the seeds over the top and the mixture started bubbling when it came to a boil in the oven, and evidently it came up over the sides. I think it's pretty neat -- plus the edge pieces have no seeds, for added variety.
    :)

    Ingredients

    1/2 cup butter
    1/3 cup raw, unsalted, unsweetened nut butter (I used almond butter)
    1/4 cup honey
    2/3 cup (packed) brown sugar
    little bit of lemon zest (grated)

    1 1/4 cups rolled oats
    1 cup mixed seeds
    1/2 cup raisins
    1/2 cup (or less) chocolate chips

    Directions
    Preheat oven to 325F. Melt first five ingredients in a saucepan over very low heat, stirring occasionally. Add in the oats, raisins, and about 3/4 of the seeds. Mix together.

    Grease an 8" baking dish and line with parchment paper (so that it's easy to remove the concoction after baking). Pour in "batter," smoothing it out on top. Scatter chocolate chips and remaining seeds on top.

    Variation: I added half of the chocolate chips directly into the saucepan to have a more chocolatey base.

    Bake for about 30 minutes. For me, the stuff came out pretty much liquid, which figures as there aren't a lot of solid (when heated) ingredients. Put it in the fridge until it cools completely -- it'll be pretty much rock hard by then. :) Store in the fridge, and eat at a little lower than room temperature so everything doesn't goo up in your hands.

    Sunday, March 27, 2011

    Chocolate Truffles - Brazilian style

    I read about brigadeiros somewhere on Smitten Kitchen a little while ago and have been wanting to try them. Her recipe is more "advanced" than I felt up for tonight. Not really, but it involves coconut milk and a longer cooking time than I was willing to commit to. So I decided to stick with the basics: cocoa powder, condensed milk, and butter. That's it. At least until I decided to roll them in stuff after being inspired by their Wikipedia page. ;)

    [Makes about 20 brigadeiros.]
    Ingredients
    3-4 Tbsp (unsweetened) cocoa powder
    1 (14 oz) can sweetened condensed milk
    1 Tbsp butter

    Directions
    Heat ingredients together in a saucepan over low heat, stirring constantly, until the mixture thickens. Chill in the fridge or freezer until the mixture is pretty firm -- malleable, but not too sticky.

    Meanwhile, chop up some things to roll the candies in. I chopped up some hazelnuts, white chocolate chips, semisweet chocolate chips, and peanut butter chips. If I'd had some coconut flakes, I'd have tried that too!

    Spread each topping in an even layer on a cutting board. When the mixture is sufficiently chilled, roll into balls with your hands (about 1-2 teaspoons' worth for each candy) and roll the balls in the desired toppings.

    I think they taste delicious at room temperature, but keep them in the fridge until you're ready to eat them.

    Storage idea
    Wrap truffles individually in wax paper. I cut the wax paper into strips, rolled each strip over a truffle so that it formed a cylinder, and twisted the ends.


    Variations:
    1) Put a whole nut (e.g. hazelnut) into a truffle with the same topping.

    2) If you like Lindor truffles, try dipping the brigadeiros in melted chocolate after doing the procedure described above and let the truffles cool. You'll end up with a hard(er) chocolate shell and soft truffle inside.

    Quinoa Tabbouleh

    This was my first experience making tabbouleh, and it came out great. I don't usually love tabbouleh, and I think using quinoa instead of the more traditional bulgur wheat is what makes this salad better than the usual, at least for my taste buds. This accompanied Asa's falafel, which was amazing.


    [Serves 4-5 people.]

    Ingredients
    2 Tbsps oil
    1-2 tsps ground cumin
    1-2 tsps ground coriander
    1 cup quinoa (I used red quinoa)
    2 cups broth (or 2 cups water + 1 bouillon cube)

    1 large carrot, grated
    1-2 handfuls parsley, chopped
    1 large cucumber, diced
    2-3 tomatoes, diced
    1 green onion, chopped fine
    1/4 cup extra virgin olive oil
    1/4 cup lemon juice

    Directions
    Heat oil in a cast iron skillet. When oil is very hot, toss in cumin and coriander and stir rapidly with a wooden spoon until the spices are dissolved into the oil. Toss on (thoroughly rinsed) quinoa and roast for 4-5 minutes.

    Meanwhile, dissolve bouillon cube in the water (or set broth to boil) in a saucepan. Add in quinoa, cover, and simmer for about 15 minutes, until all the water is absorbed into the quinoa. Put the quinoa into the fridge to let it cool.

    Meanwhile, combine all the other ingredients in a salad bowl. Throw in cooled quinoa. Toss together and serve.

    Falafel - Second Attempt

    I tried making falafel for Matt and Anna the other night. The first attempt didn't go so well; the first few patties went in whole but never came out. They didn't stay together and just degenerated into a chickpea crumble at the bottom of the pan. Fortunately Matt was around and suggested adding more flour to the mixture, which saved the day. I was able to cook two batches successfully before the oil turned to chickpea sludge and we had to stop due to health code violations.


    I tried following Alton Brown's recipe:
    1 pound dried chickpeas, sorted and rinsed
    1 teaspoon whole cumin seed
    1 teaspoon whole coriander seed
    2 cloves garlic, coarsely chopped
    4 small scallions, trimmed and finely chopped
    2 teaspoons kosher salt
    1/2 teaspoon freshly ground black pepper
    1 teaspoon aluminum-free baking powder
    1/2 teaspoon cayenne pepper
    2 tablespoons chopped fresh parsley leaves
    2 quarts peanut oil
    Pita bread, warmed, for serving
    I made a few adjustments: I used 3 cans of chickpeas instead of soaking my own pound. I used soybean oil instead of peanut oil and finally I added about a cup of fava bean flour to dry out the mixture. I just kept adding the flour until the mixture had the texture of cookie dough and then fried 'em up!


    To actually make the mix you just put the oil in a pot with tall sides (to avoid spill over of hot oil; I learned that this is pretty important) and heat it to 350 degrees. In the meantime put all the other ingredients other than the flour in a food processor and pulse until there are no more whole chickpeas. Add in the flour, mix with your hands, and form into the shapes you want to fry! I made patties that were about an inch and a half in diameter. Then to cook just put gently in the oil and cook until golden brown. For me this took about 7-8 minutes.


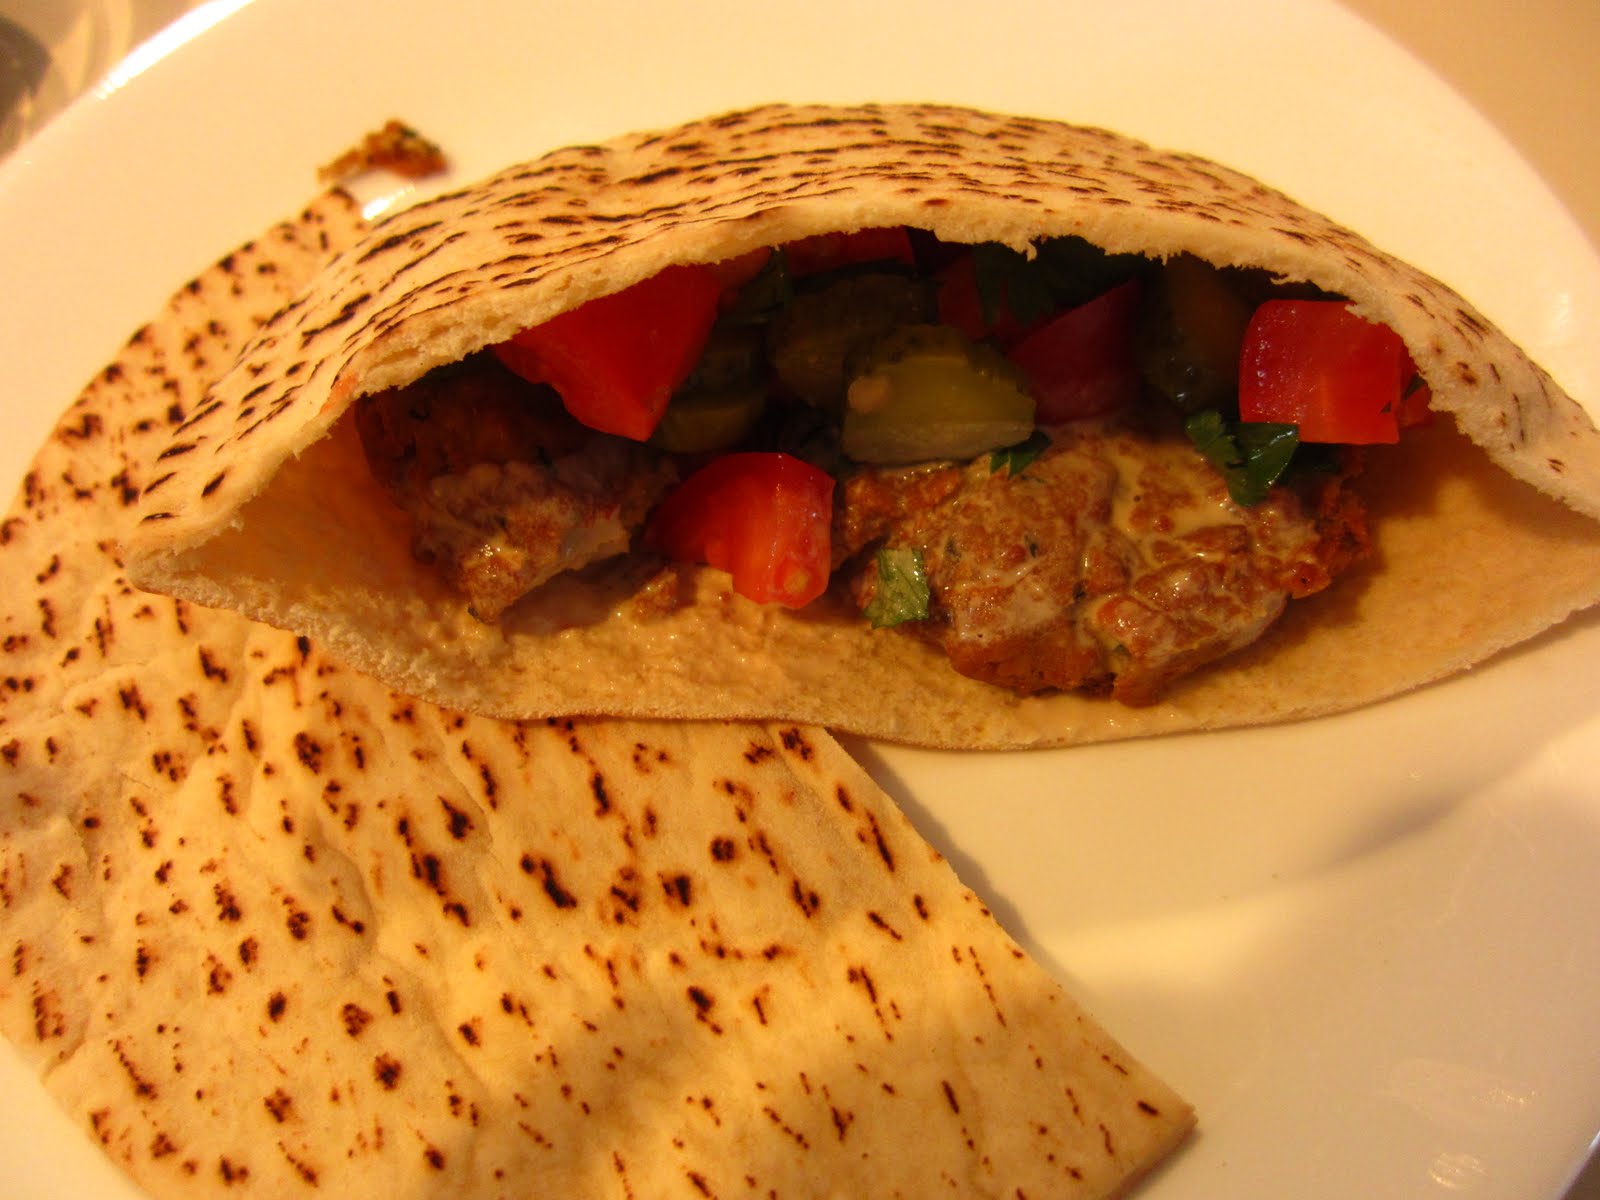
    For sides and dressing I cut up some cucumbers and tomatoes, added some parsley, and put that in one bowl. In another I put chopped pickles, in another yogurt mixed with chopped parsley and finally one with tahini mixed with lemon juice.To make a falafel I took a pita, put in some cooked falafel and then add pickles (a must!), some tomato/cukes and either tahini sauce or yogurt sauce. They turned out pretty good and were really easy to make :)

    Thursday, March 24, 2011

    Simple Fried Rice

    The beauty of fried rice is that it doesn't have to answer to any standard or higher authority - nobody can tell you that it's done wrong. Technically you also need no recipe for it, but a starting point always helps.

    This is a quick way of making this dish that works well for me, in part because it calls for "exactly what's in my fridge", which is often ... not much.

    You can add anything you want to it and see how it comes out. It also tastes great by itself, courtesy of a few spices.


    So, here's the scrounging plan:

    Basics

    • Some Cooked Rice.
      Any rice would do if you're OK eating it. I use white Basmati (0.5 cup rice + 1.5 cups water, simmered covered until absorbed). I usually throw a little Ghee in it.
    • 1 Onion (large or a couple small)
      Diced, chopped, or cut into rose petals if that's what you like.
    • Shortening of choice (butter, ghee, etc).
      I use ghee when I can, and coconut oil is quite good too.

    Optional but helpful:

    • 1 Potato (large or a couple small)
      Chopped really small. I use one of these to chop this and the onion in seconds.
    • 1 Egg
    • Random Vegetables (eg peas, edamame, corn, beans, scallions, etc) - whatever you have. The only concern with these is that they can add too much water, especially if they are frozen - drain or dry them a little, or just cook everything a little longer.
    • Meat, Tofu, etc can also be added
    • Spices:
      • Salt
      • Pepper (fresh ground ideally)
      • Turmeric
      • Cumin

    Execution Plan

    1. Cook the rice - that will probably take 10-15 minutes so you'll have time to do everything else
    2. Heat some spices in the butter/ghee on a large pan. I grind pepper and throw in cumin and turmeric to taste. (More cumin than turmeric, ideally).
    3. Chop the potato and add to frying pan, fry on medium-high heat, turning nearly constantly. 3-5 minutes should be plenty - it'll start to look a little like hash-browns.
    4. Add salt and maybe more spices!
    5. Chop the onion and add to potato, fry a bit more.
    6. If using other veggies, you can add them now or later.
    7. Rice should be ready by now, toss it in and fry some more, turning constantly.
    8. When you feel that things are about done, crack an egg into the mixture and toss feverishly so it is evenly combined into the mix. The egg will cook in seconds, and you're done.


    Wednesday, March 23, 2011

    Honey Cornbread

    I started making this cornbread 1-2 years ago, and I don't remember whose recipe I started with, or what it looked like at the beginning. But it's undergone quite a few changes, and doesn't look (or taste) much like the original at all. This produces a slightly sweet, airy, and moist cornbread. The more coarse the cornmeal, the tastier the cornbread, in my opinion, so I prefer the kind you can buy in bulk from grocery/health food stores. But any cornmeal will do. This tastes great grilled the next morning in a bit of bacon grease, too, and can easily be used to make corn muffins instead of a loaf (see footnote).

    If you want to make this gluten-free, it's surprisingly easy. Just swap (cup for cup) the flour for your favorite gluten-free flour (I love this one for quick breads) and add about 3/4 teaspoon of xanthan gum. I've never been able to tell the difference. :)

    Ingredients
    1/2 cup butter
    1/3 cup sugar
    1/4 cup honey
    2 eggs
    1 cup buttermilk*
    1/2 tsp baking soda
    1/2 tsp salt
    1 cup flour
    1 cup cornmeal

    * You can substitute a tablespoon of lemon juice in a cup of milk for the same effect.
    Directions
    Preheat oven to 375 degrees Fahrenheit and grease an 8"x8" glass baking dish. In a large skillet, melt butter. Remove from heat. Pour in sugar and honey and whisk until blended. Combine buttermilk and baking soda in a cup and set aside. Crack two eggs onto skillet and immediately pour on buttermilk mixture. Whisk together until blended. Pour on salt, flour, and cornmeal. Turn mixture with whisk until just blended. Do not overmix or the cornbread/corn muffins will be too dense. Pour batter into a greased baking dish and bake on top rack of preheated oven for 30** minutes, or until the top of the cornbread is golden brown and feels solid to the touch. Allow to cool for 10 minutes before eating.

    ** If you are making corn muffins, bake for about 20 minutes. These muffins won't rise as much as regular muffins do, so you can fill each cup in the muffin tin anywhere from 1/2 to 3/4 full, depending on how much of a muffin top you want to see. If any of the cups are unfilled when you've poured all the batter, fill those cups 1/2 way with water, which helps the muffins cook more evenly.

    NB: Once you mix the buttermilk and baking soda, they start to react. Therefore, you want to do everything quickly after that step, as baking soda is not a double-acting agent. If you let them react for too long, the cornbread will come out more dense. Play with the timing in the recipe until the density is to your liking.

    Sunday, March 20, 2011

    Grilled Mahi Mahi with Couscous

    Ingredients (for Mahi Mahi marinade)
    1/4 cup lime/lemon juice
    2 Tbsp olive oil
    1 clove garlic
    2-3 tsp spicy brown mustard
    1/4 tsp salt
    one twist of fresh ground black pepper
    1 tsp of Worcestershire sauce

    Whisk together and brush as much on Mahi Mahi fillets as possible. (This amount is probably good for up to 8 fillets.) Set aside. Meanwhile, make couscous (the following is good, or perhaps even a bit much, for 2 people):

    Ingredients (for couscous)
    2 cups water
    1 boullion cube
    1 cup couscous
    1 handful of chopped parsley

    Dissolve cube in water. Bring to a boil. Turn off heat and add in couscous. Cover and set aside for 7-8 minutes. Then, sprinkle on parsley and toss together. Keep covered until fillets are grilled.

    Grill Mahi Mahi fillets for about 5 minutes on George Foreman grill or equivalent. Serve on bed of couscous.

    Variations:
    Use brown rice or quinoa instead of couscous for a gluten-free variant.

    Flourless Chocolate Cake


    Ingredients
    8 oz chocolate
    1/2 c. butter
    1/4 c. hot brewed coffee
    1/2 tsp. vanilla
    3/4 c. sugar
    3 eggs
    1/2 c. cocoa

    Preheat oven to 375. In a double boiler, melt chocolate, butter, coffee, and vanilla. Remove from heat. Whisk in sugar. Whisk in eggs until well blended. Fold in cocoa (until just mixed). Butter round 8" cake pan and pour in batter. Bake ~25 minutes (until very thin crust forms on top of cake). Let cool for a couple of minutes before eating. (Especially good with vanilla gelato!)

    Variation: Sliced almonds on top.